Streamlining AWS Container Deployments Through AI Innovations
Container deployment with AWS can be quite complex, requiring some advanced configuration and more hands-on management. AWS is undoubtedly a great tool for DevOps engineers, but developers constantly feel the need for it to streamline deployment and management processes.
Over the years, developers' work with cloud infrastructures like AWS has significantly improved. This is because tools like Microtica streamline deployment processes and reduce management complexities. Microtica is one of the few tools reinventing the approach to working with the cloud, and it also helps engineers save time.
In this article, you’ll learn how AI simplifies AWS Cloud integration and transforms container deployment. This tutorial will also walk you through the steps on how to deploy containers using AWS as the underlying cloud infrastructure.

The Role of AI in Container Deployment
Just as AI has a huge responsibility in modern cloud orchestration, it also plays a huge role in container deployment. In this section, we will look into the importance of AI in container deployment and how it helps reduce deployment stress.
1. Automating infrastructure provisioning
Working with AWS containers requires you to manually set up clusters and make advanced network configurations. However, with AI-powered tools like Microtica, you do not need to worry about this, as it helps provide added support for infrastructure automatically and automates tasks, thereby reducing setup and management complexities.
AI-powered tools help to reduce the complexity of working with cloud infrastructures by automating infrastructure provisioning and providing ease with setting up integrations.
2. Intelligent resource allocation and scaling
Working with AI-powered solutions for cloud delivery automatically monitors the needs of the cloud infrastructure, thereby adjusting resources to eliminate common bottlenecks and slow performance. Ideally, you don't want your application to be laggy or slow—these issues are usually caused by insufficient storage and memory.
Engineers could do this manually, but the approach is time-consuming and could even lead to more complexities for them and developers while trying to allocate resources and scale.
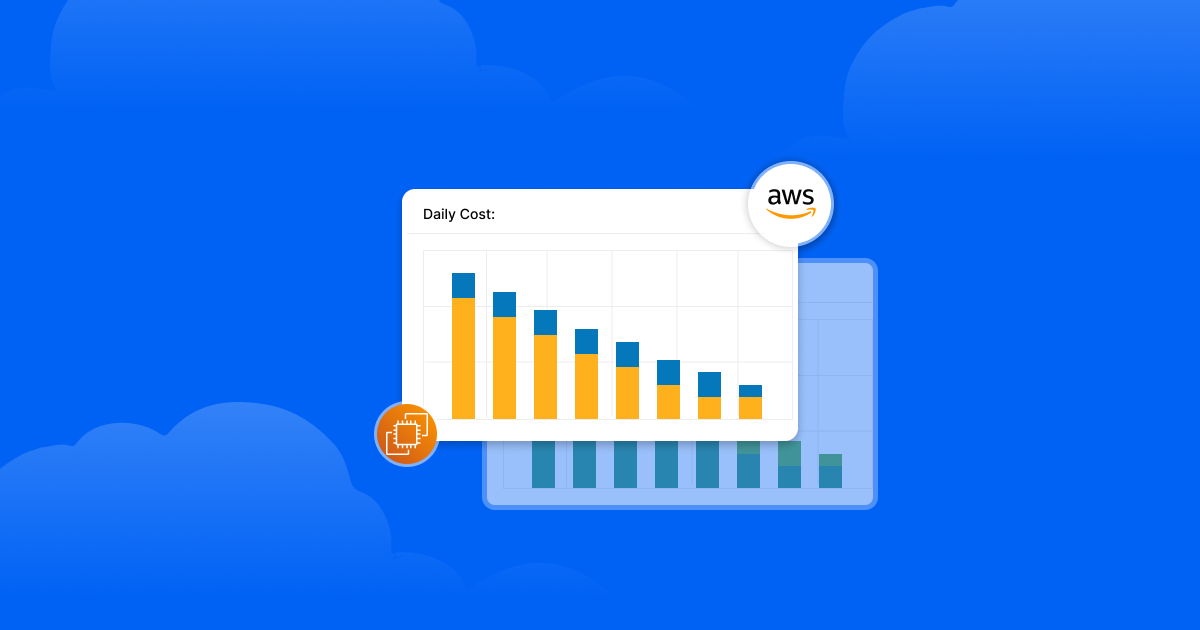
3. AI-Driven Cost Optimization
Most AI-powered solutions for cloud delivery help to reduce costs by predicting what you'll most likely need based on historical analysis. It ensures that resources are allocated based on exact demand to cut unnecessary costs; this automated practice ensures that teams don't spend too much money on excessive cloud storage. Refer to this guide to learn how Microtica optimizes costs.
With that being said, it prevents both under-provisioning and over-provisioning; it works with only the things you need.
What is Microtica?
People often refer to Microtica as a platform that eases the stress of cloud delivery.
Microtica goes beyond easing the stress of cloud delivery. It is a versatile cloud delivery platform that simplifies the way developers work with infrastructure and deploy applications in the cloud using just one UI. With Microtica, you don’t need to worry about writing scripts or manually managing the underlying infrastructure.
Although you can still do some things yourself, Microtica provides prebuilt templates for different technologies in every facet—they serve as quickstarts for getting started with Microtica. This article is focused on deploying applications on top of AWS using Microtica.
Apart from that, Microtica offers several other features that we will explore in the next section of this tutorial.
Benefits Of Using Microtica
Before getting our hands dirty, I thought sharing some benefits of using Microtica in your development and deployment workflows would be great. In this section, you’ll learn about some of Microtica’s capabilities and why you should use Microtica for container deployment.
1. Unified Platform
In Microtica, you have everything you need in just one user interface without manually working with any tools. Imagine a world where you don’t need to worry about learning Kubernetes or how to use any cloud or containerization tools—it would be great, right? That’s exactly what Microtica provides!
You don’t need to be an expert at Kubernetes before working with it; it’s like working with underlying infrastructures indirectly and still getting the same results without manual constraints. Working with Microtica involves you working with a UI; there’s no need to do anything locally.
2. Pre-built templates
Microtica offers its users pre-built templates for deploying their applications in any container environment of their choice. There are templates for working with frameworks, libraries, and even cloud tools. The templates are mainly for getting your code into production quickly without making too many configurations.
3. Integrated Container Monitoring
Microtica gives real-time updates on the container’s health, warnings, and errors. It’s like an observability tool embedded inside Microtica. It also provides updates on performance and resource usage. An added advantage is that this feature lets you track previous performance, health, and resource usage as well.
4. Microtica makes developers more productive
As you do not have to worry about manual controls and advanced configurations, a lot of time is saved. This lets engineers get the best out of their work and makes them more productive. Microtica has proven that there is a lot you can do without focusing on configuration complexities.
Hands-on! Let’s see Microtica In Action 🎉
By now, you should have seen Microtica’s capabilities and how it can boost your DevOps team workflow by focusing on what matters. With Microtica’s unified platform, there are a lot of powerful things you can do in a few minutes.
In the next section, we will dive into the main thing for the article—deploying a container on top of AWS with Microtica.
Let’s get our hands dirty! 👨💻 🙌

Step 1: Creating a Microtica Account
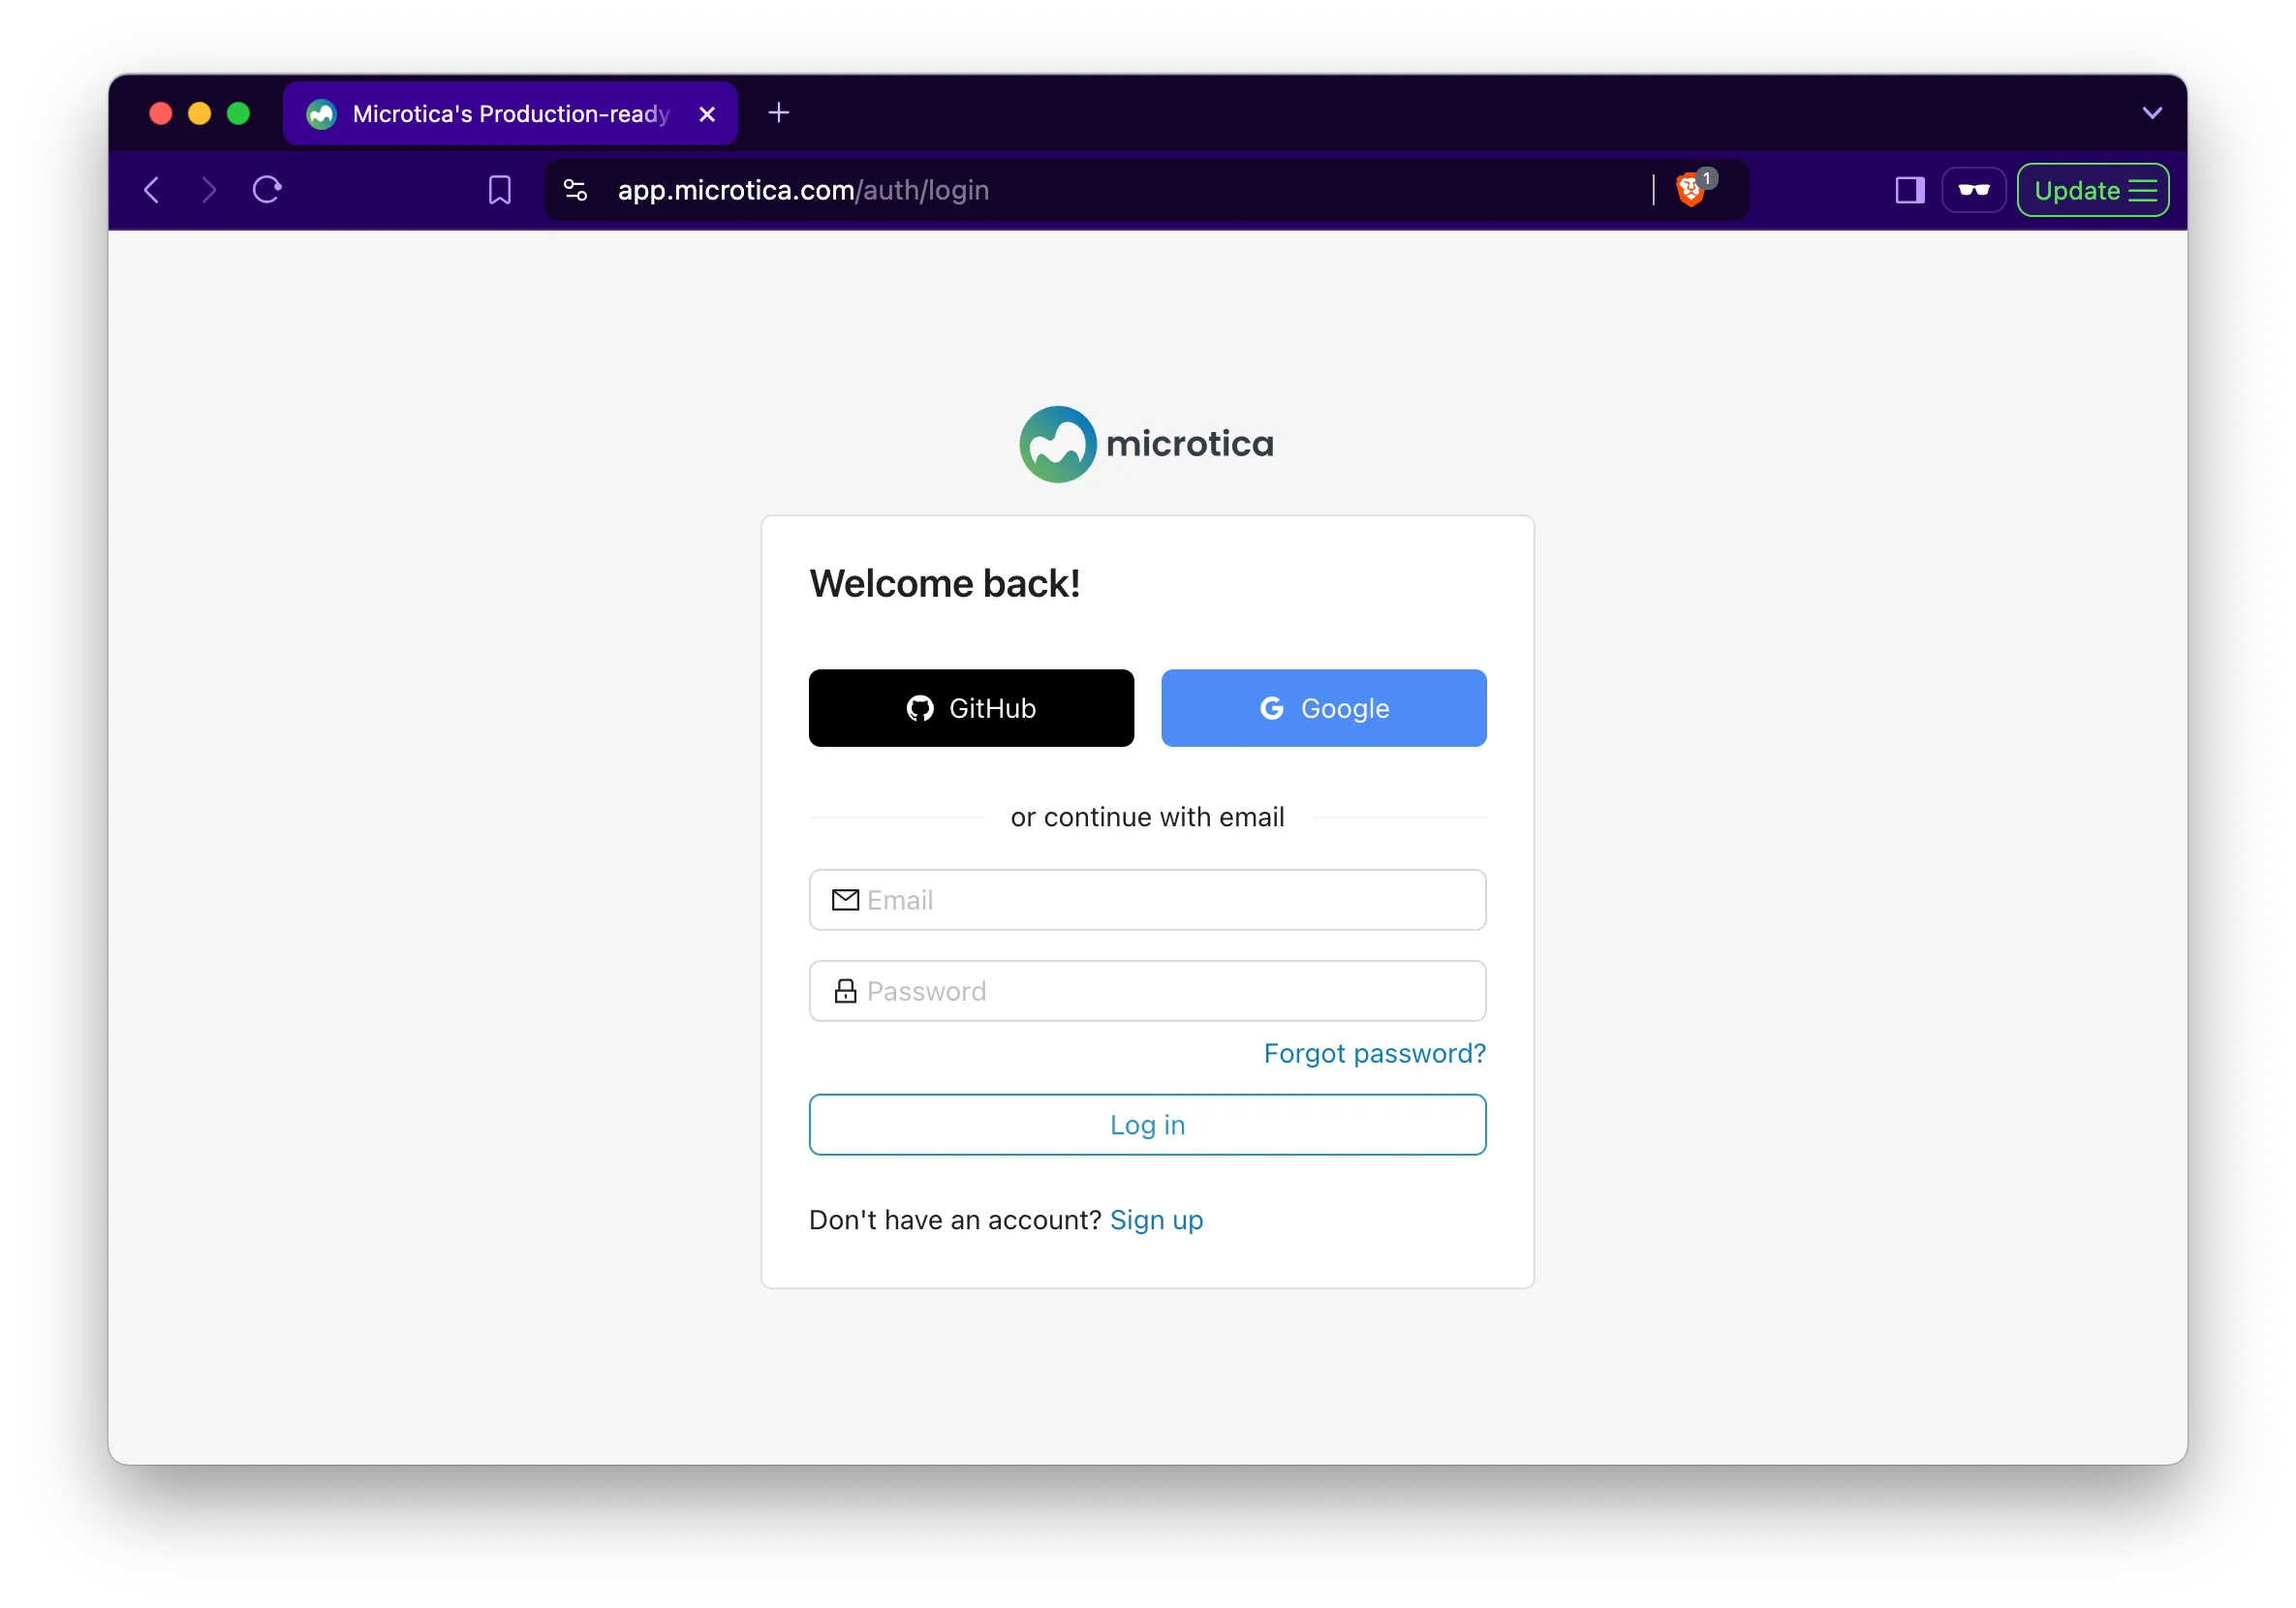
To get started, you need to create a Microtica account. This is the first step. You can sign up using your email, GitHub, or Google Auth. Once you do this, you'll be redirected to the unified platform.
Step 2: Connecting Your AWS Account
When you create an account on Microtica, you'll go through an onboarding process where you set up your own project. During this process, you’ll also add your AWS account. If you need to manage cloud accounts later, you get that done from the Integrations tab under the Cloud Accounts section.
From here, it’s Integrations > Cloud Accounts > Connect AWS Account > Connect.
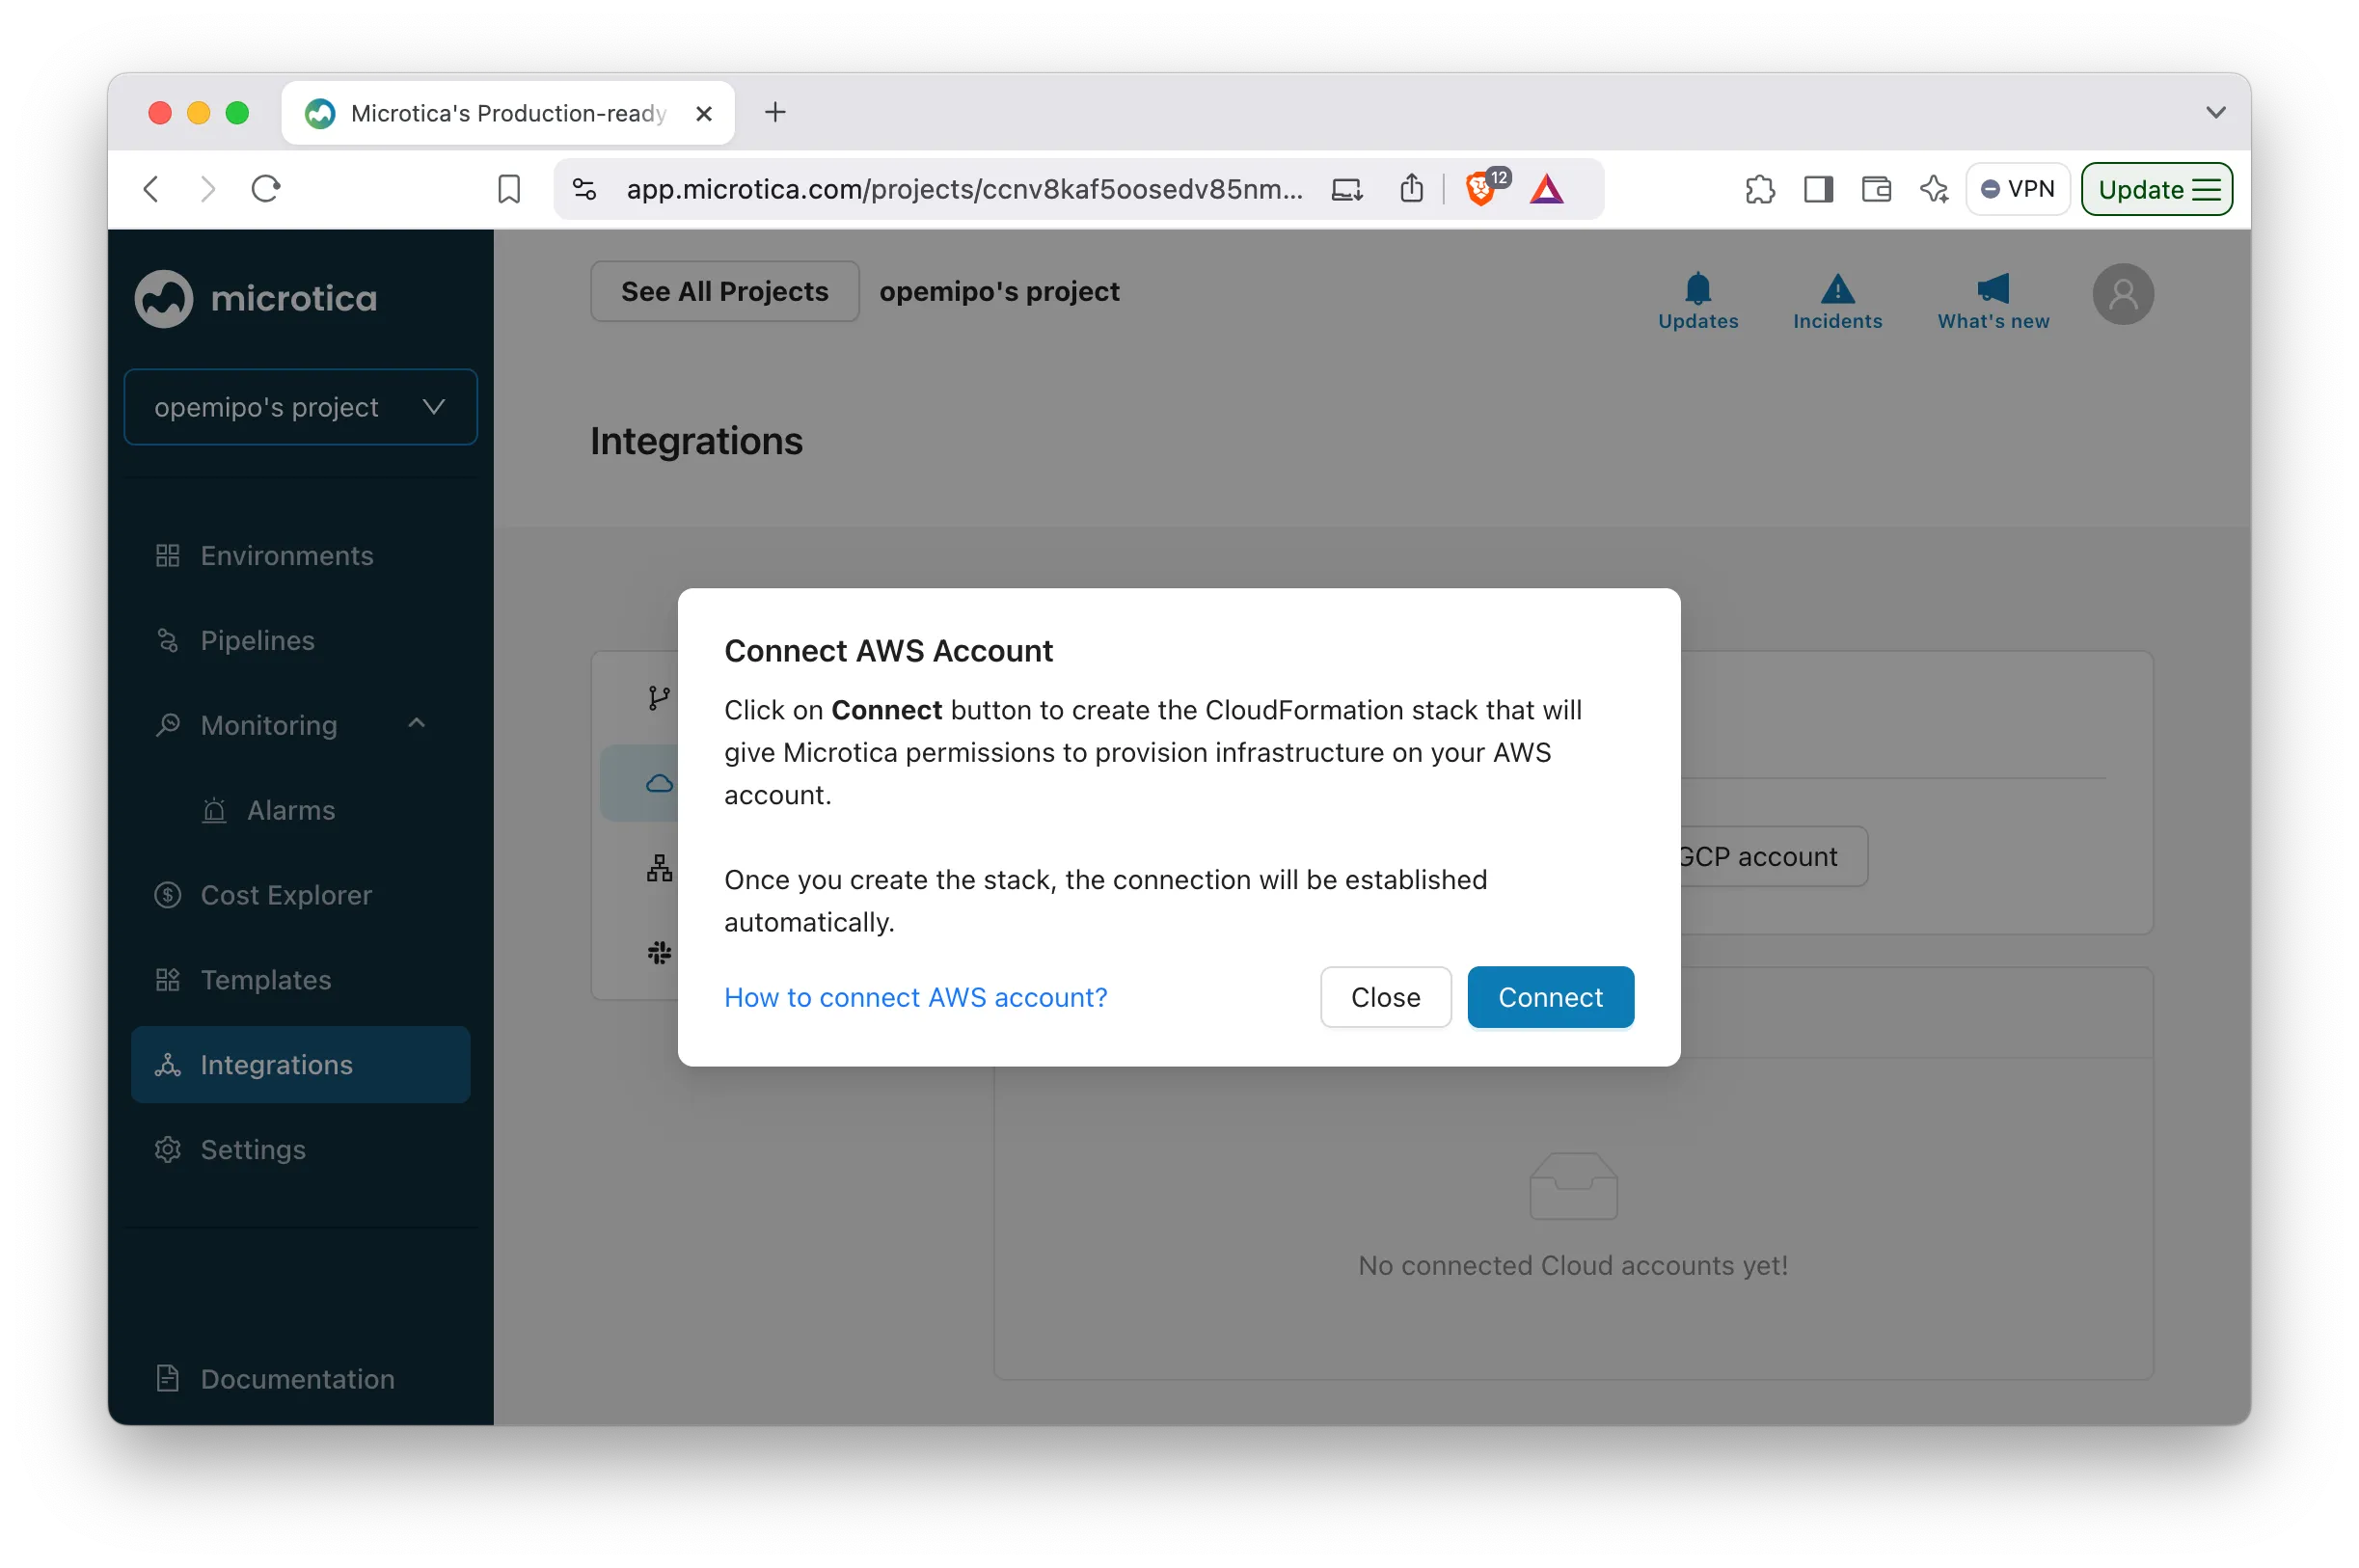
When you click the Connect button in the modal, you'll see a dialog that redirects you to your AWS account. Fill in the required credentials, tick the required capabilities checkbox, and click the Create stack button. Once the CloudFormation stack is created, your AWS account will automatically show up in Microtica’s Console.

Yay, you now have your AWS Cloud account connected. 😃🎉
Step 3: Choosing the Right Template
Choose any template of your choice. Microtica lets you explore any of the available technologies. You can explore them in the **pre-built template directories** or under the Templates tab on the platform. In this article, we will be working with EKS, so we will be using EKS's pre-built template for containerization.
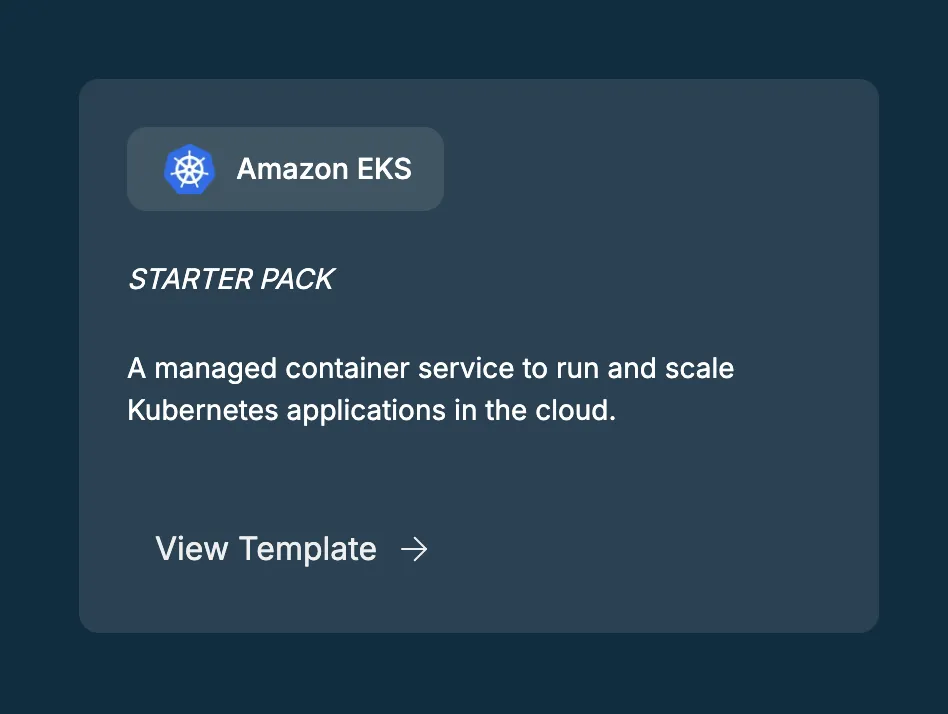
Select the Amazon EKS starter pack template in the templates’ directory.
You’ll have to configure the template to create a Kubernetes Cluster from here.
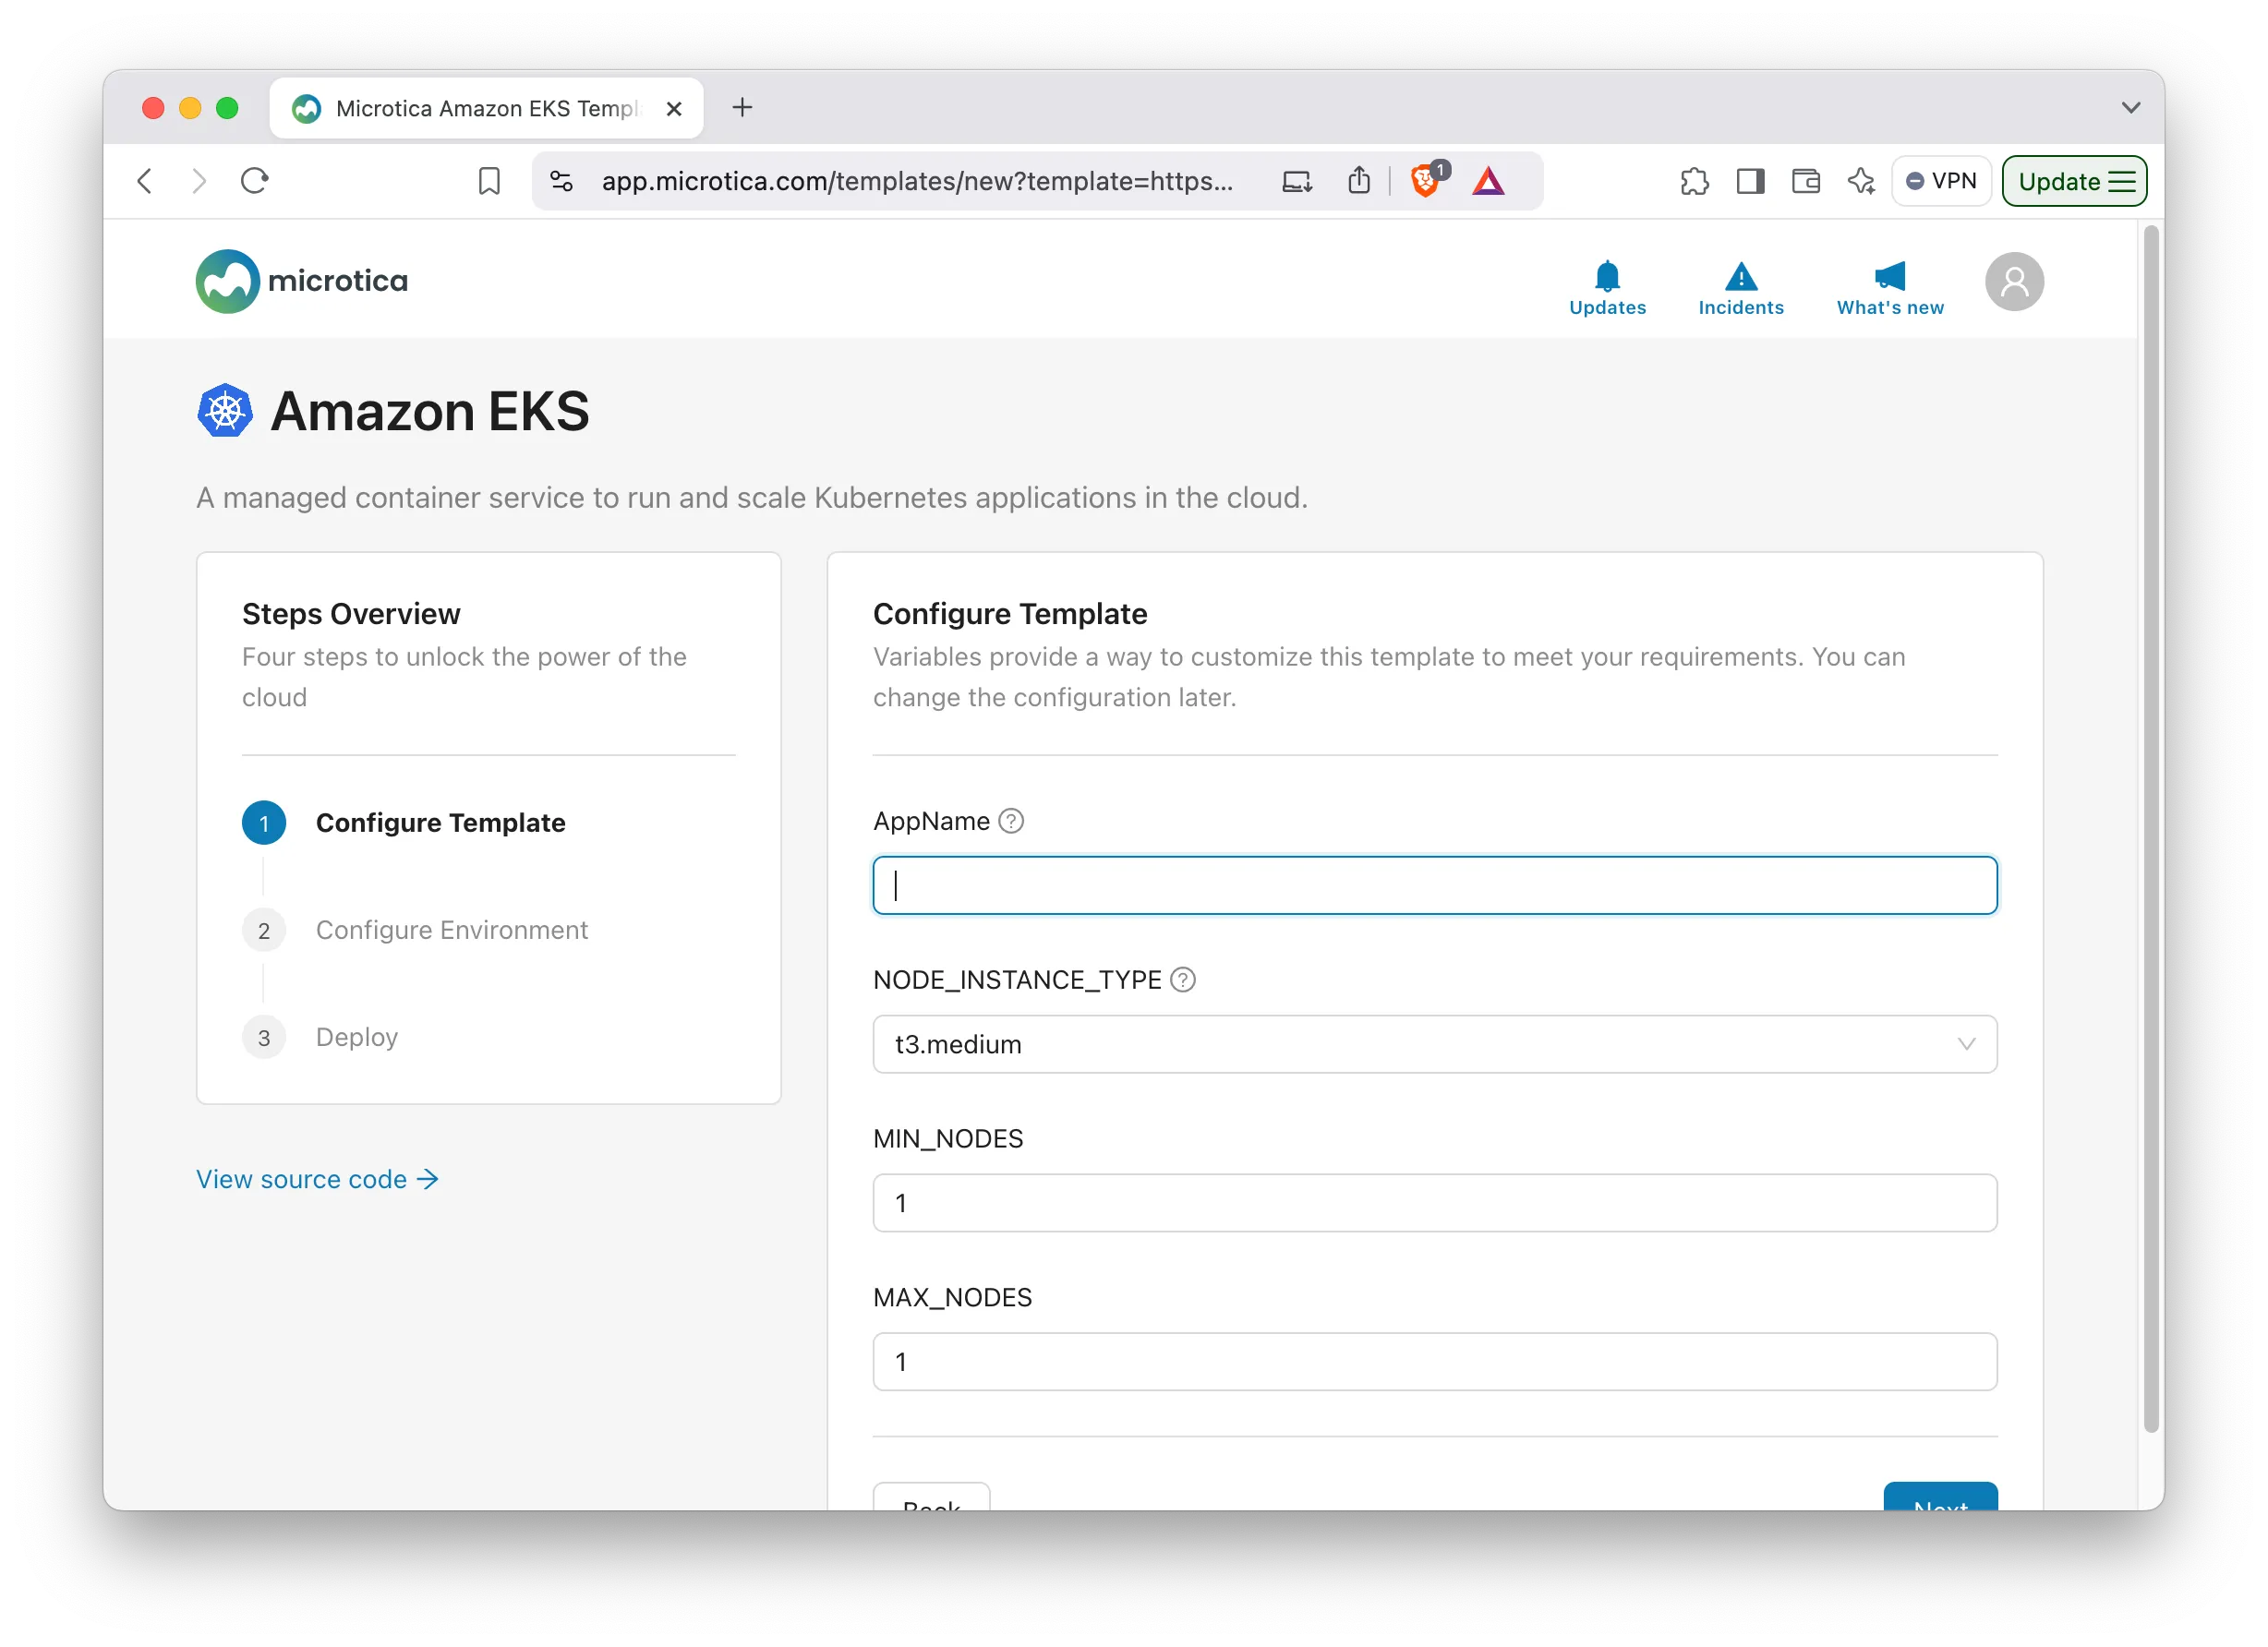
You need to give the cluster a unique name and select the node instance and configurations you want the cluster to use.
These environment variables use an EC2 t3.medium instance with 1 node, which is a minimal configuration for trying out the template. For more serious purposes, you would need more compute power, such as t3.large, t3.xlarge, and t3.2xlarge. If you are working on something smaller, you can stick with a t3.small EC2 instance.
Click the Save button to proceed to configure the environment.
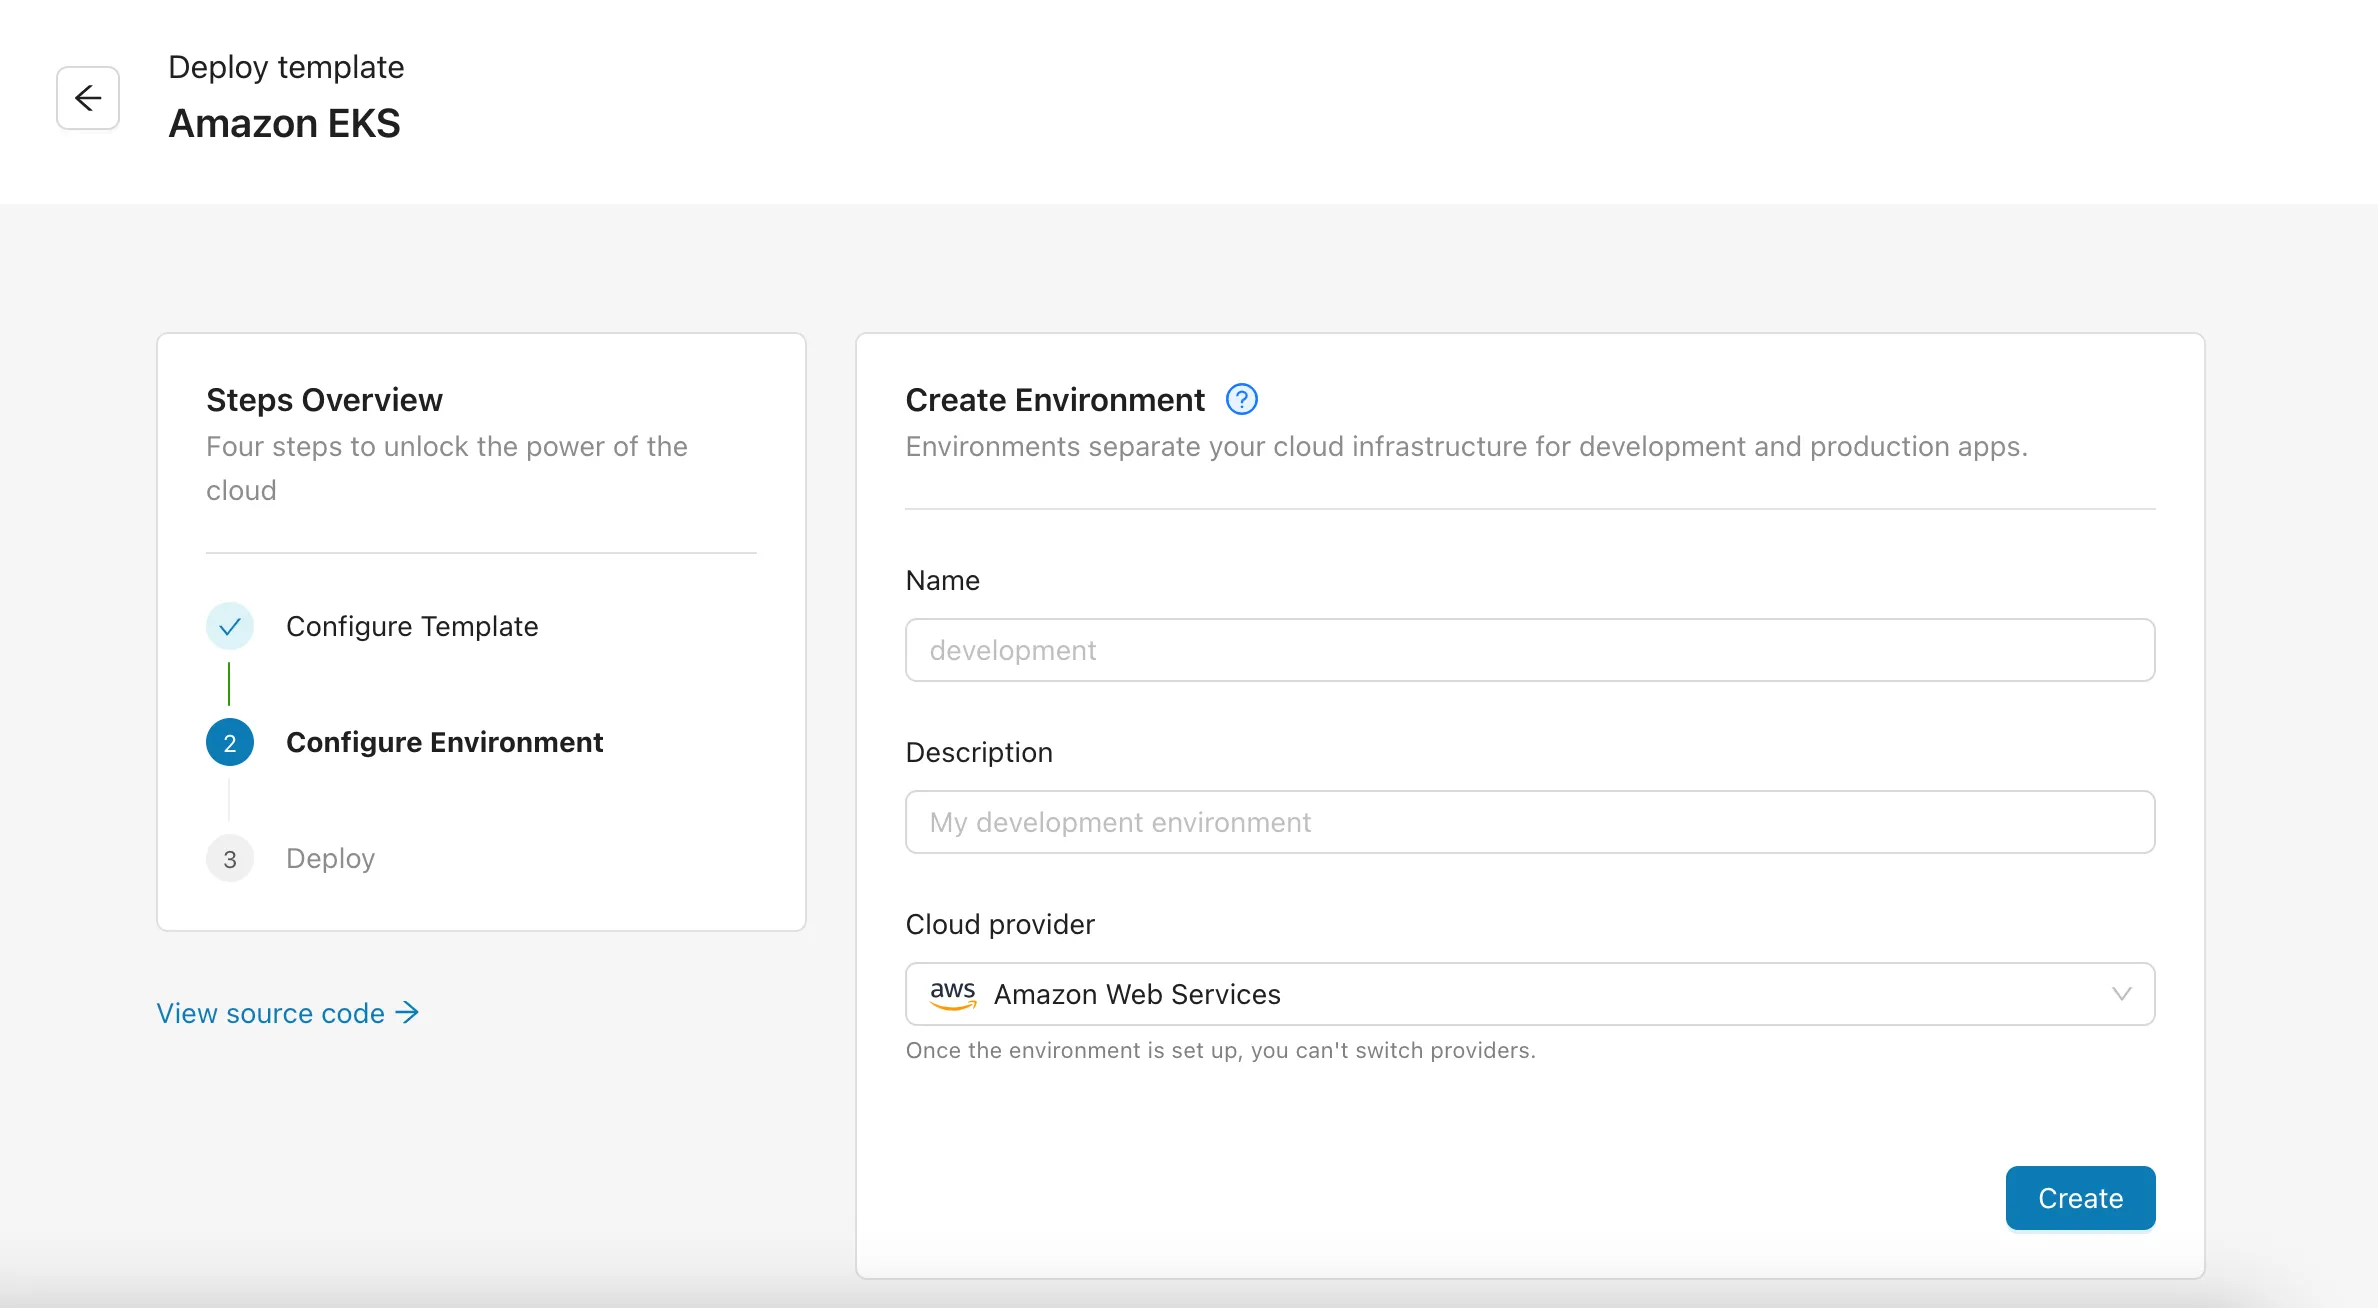
In the image above, you now need to create an environment where you want to deploy your EKS Cluster so you can own your infrastructure and data.
You need to create a name and description for your environment. Additionally, you need to specify the cloud provider where you want to deploy the cluster. In this article, we will be using AWS as the cloud provider.
Once you’re done, click the Create button and link your AWS account to the environment.
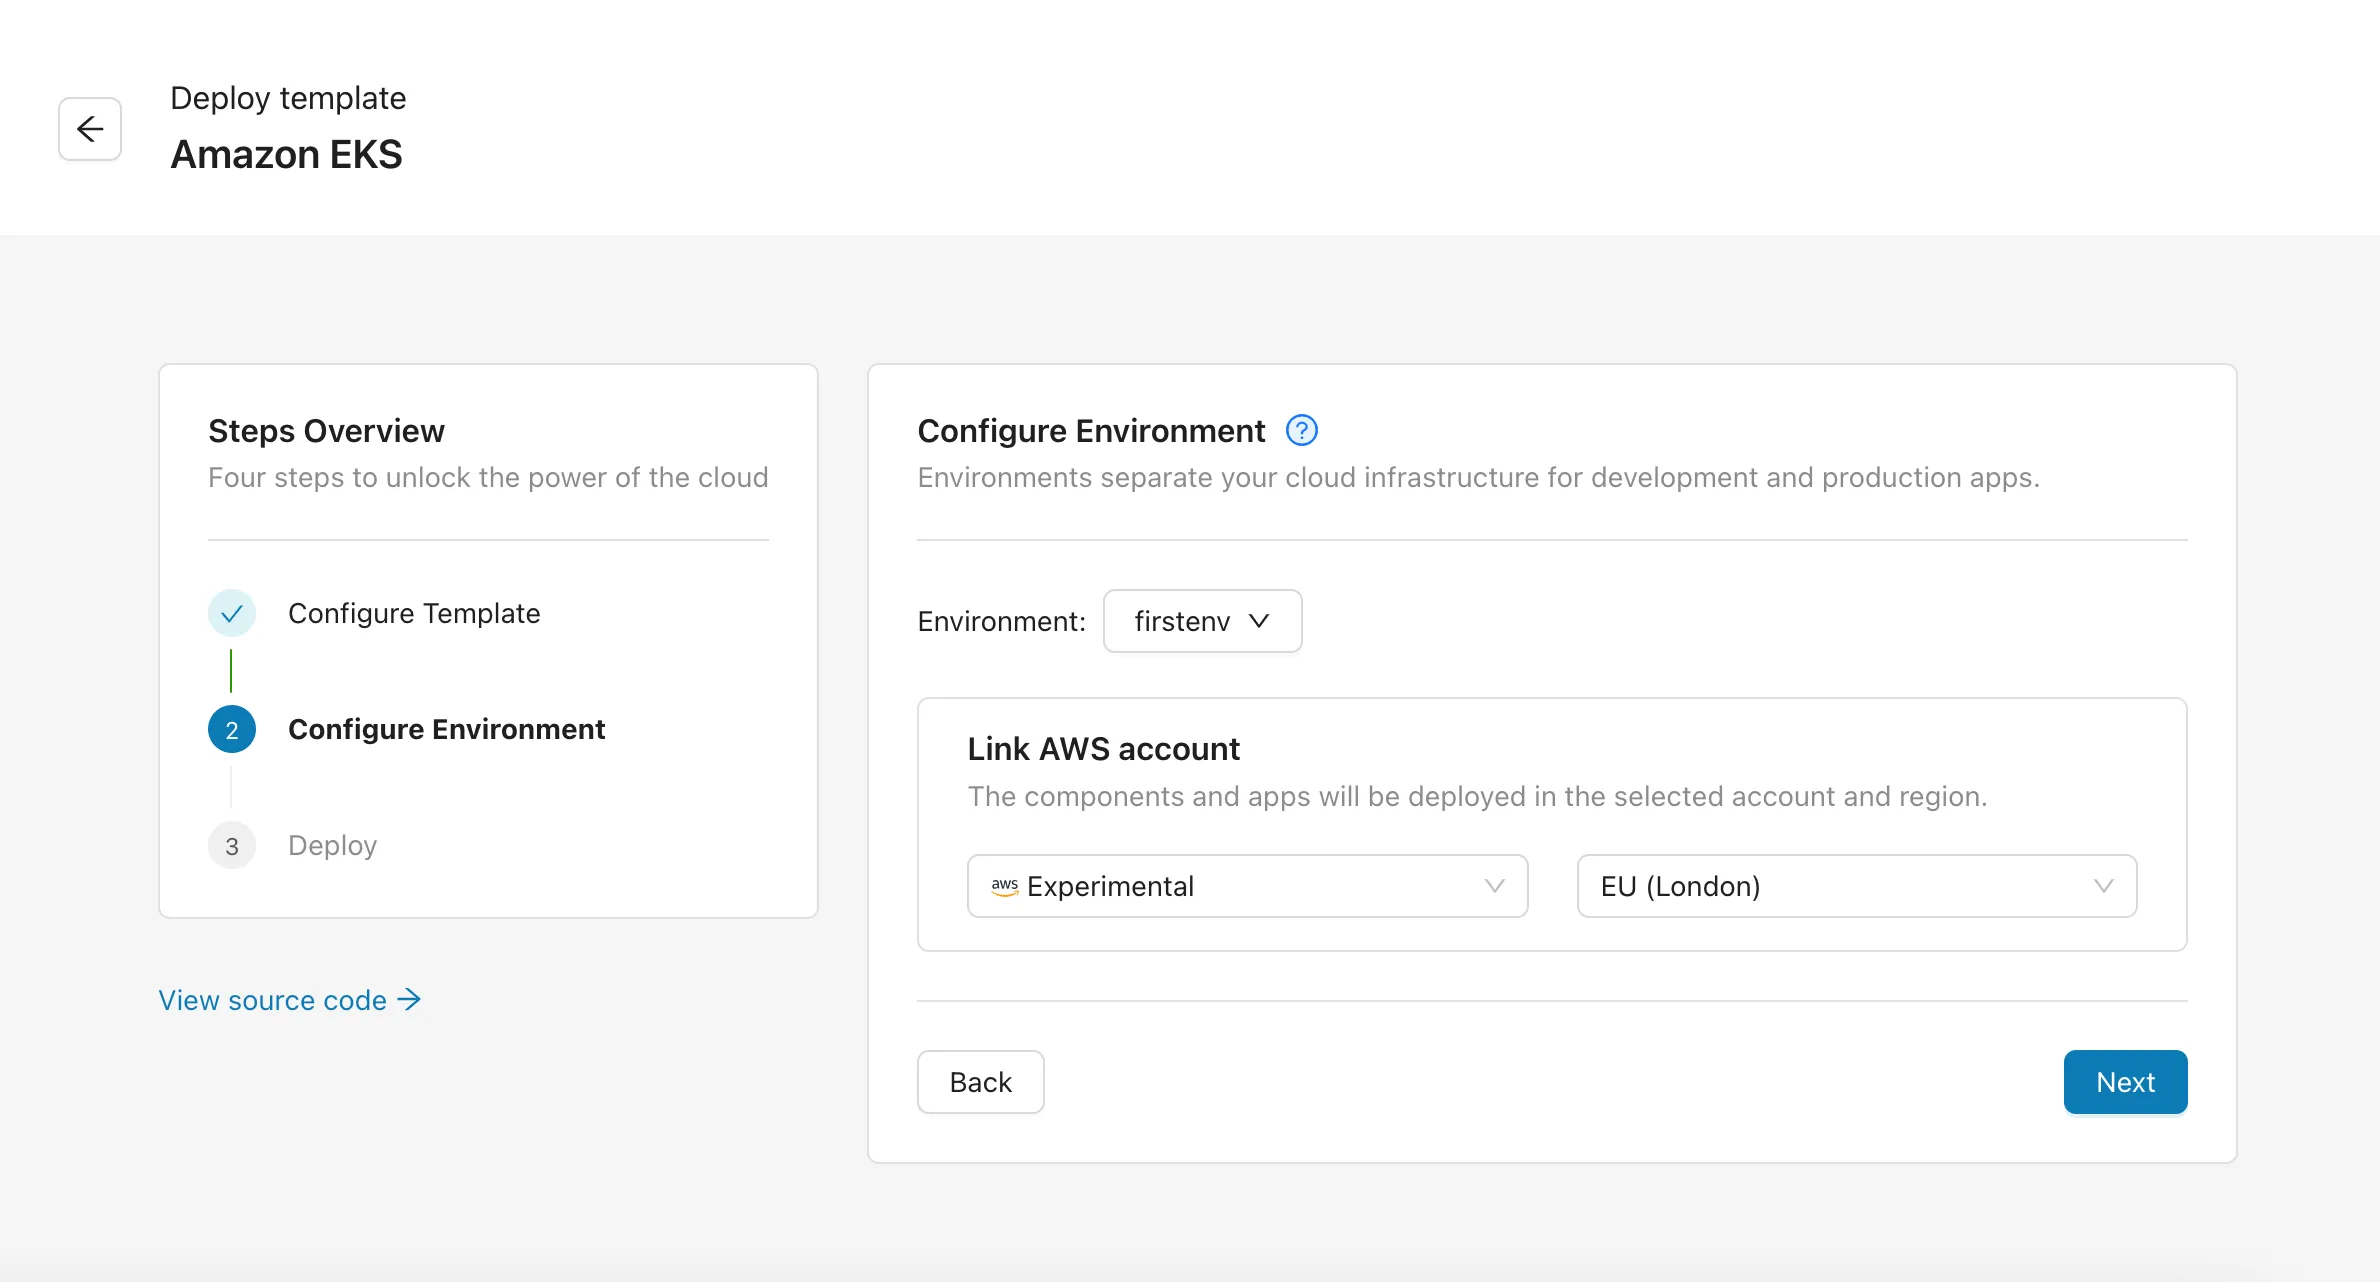
Choose the AWS account and the region where your cluster will be deployed. Once done, click the Next button.
You should see this after clicking the button 👇:
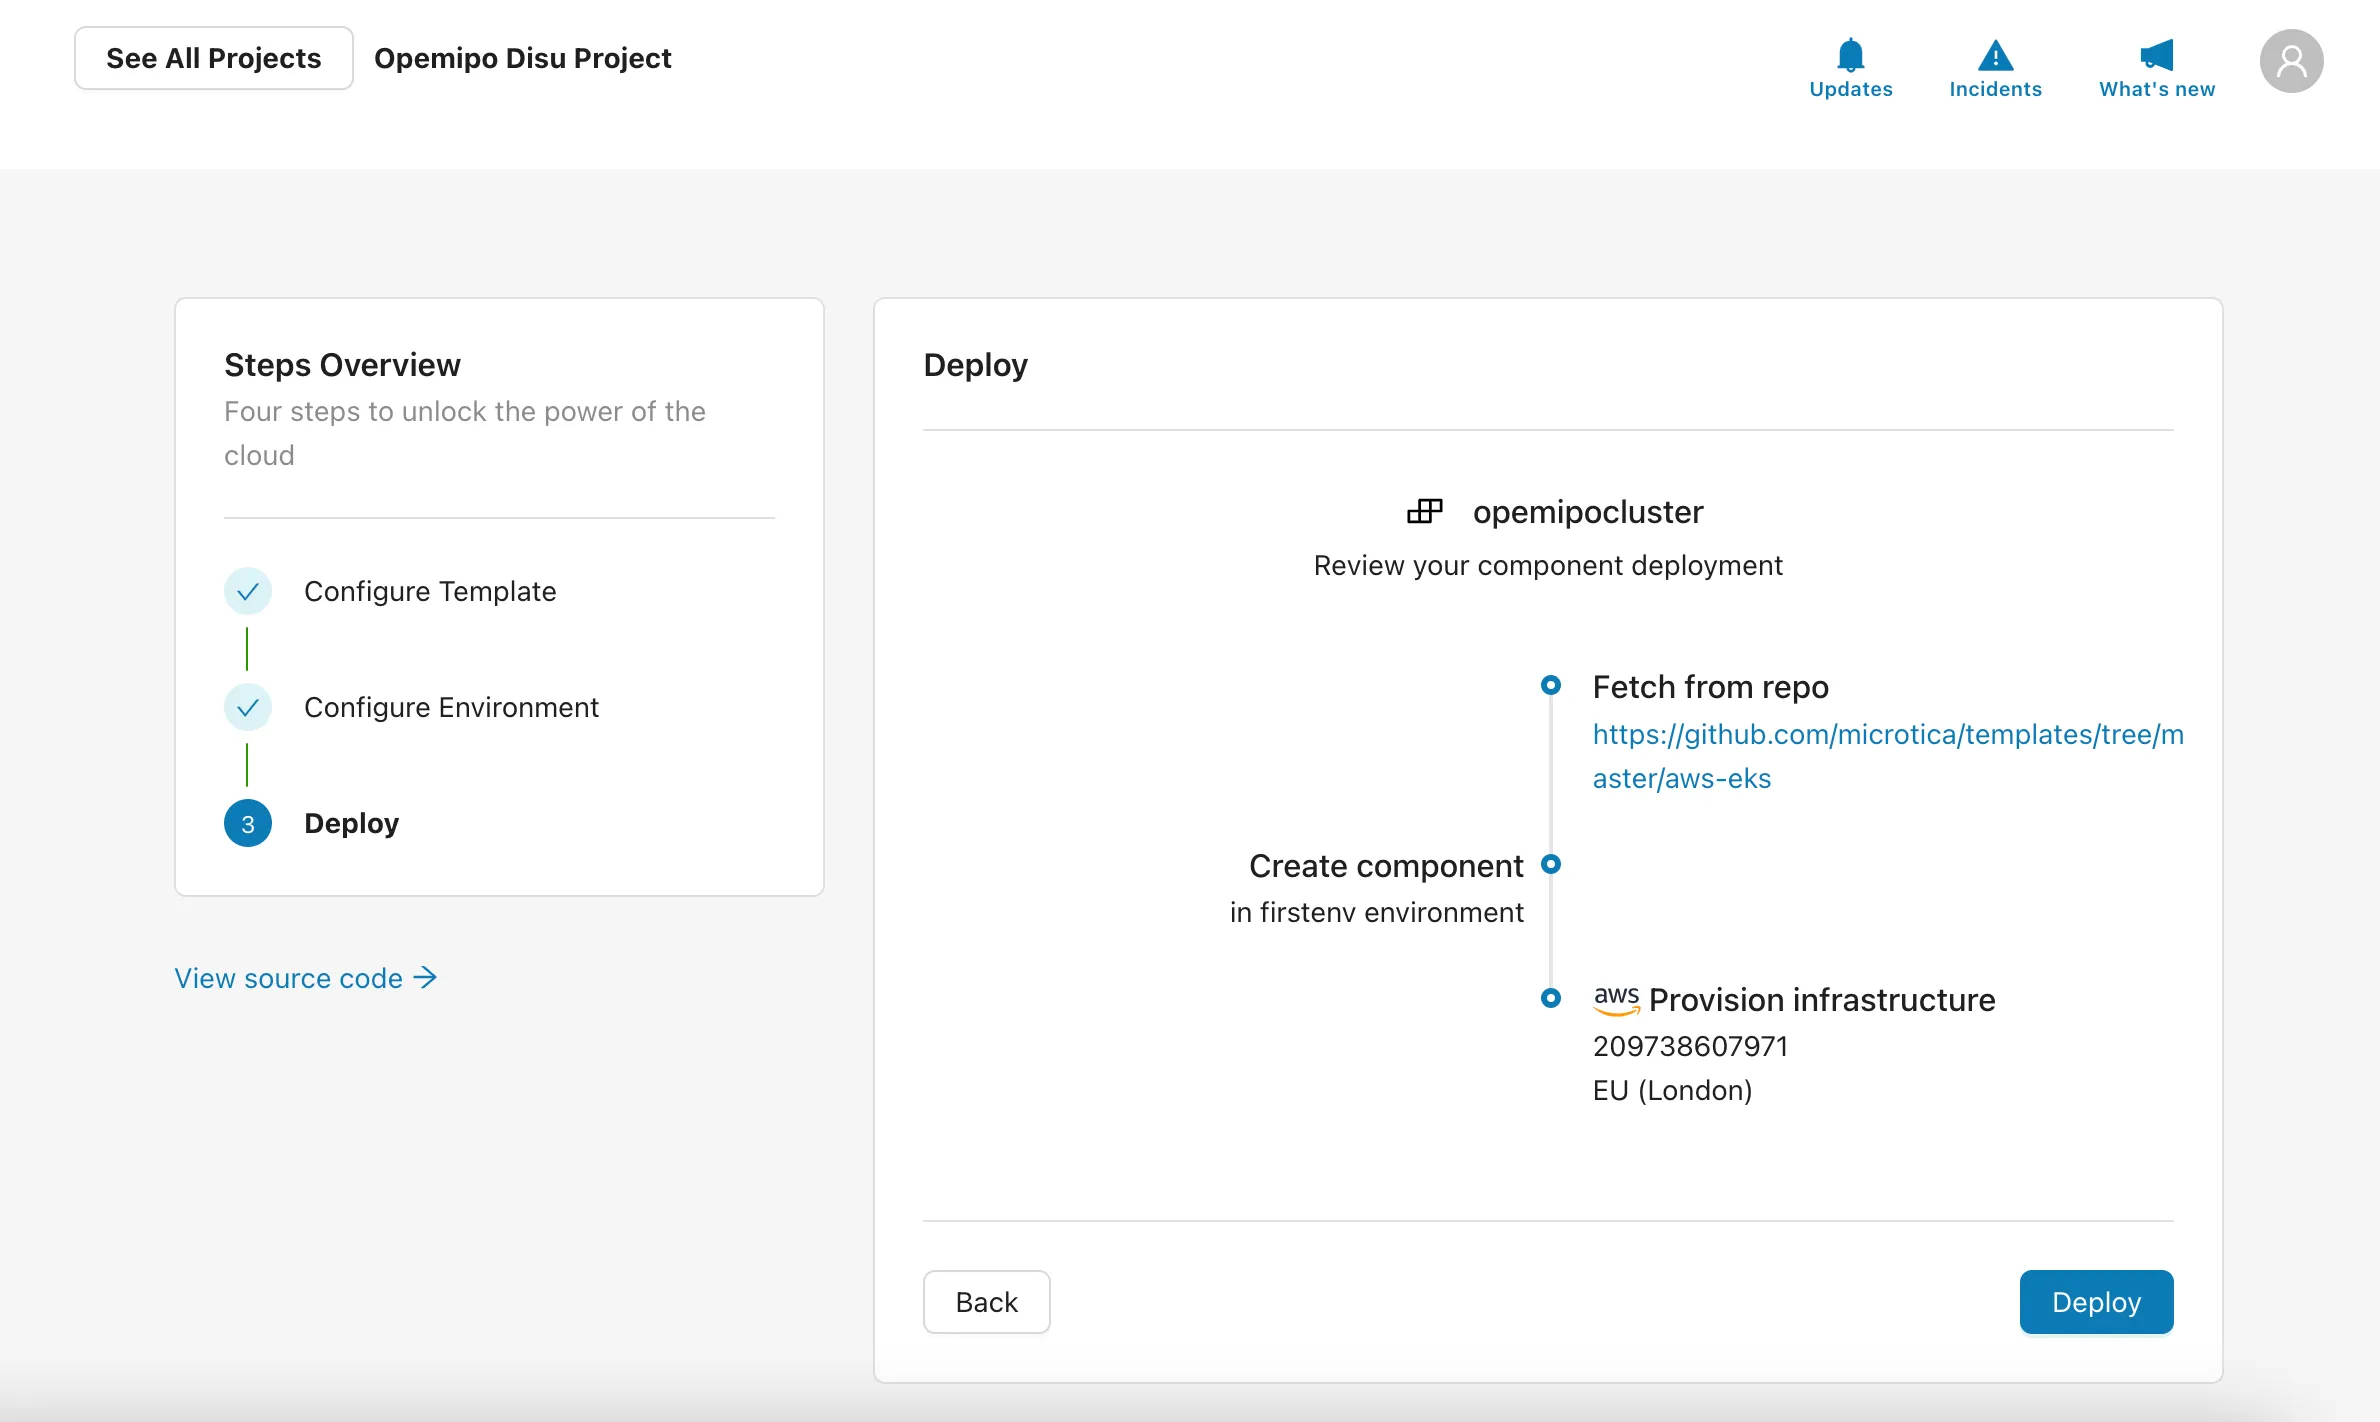
This shows the process it uses for the component deployment. It provides enough transparency that you can even see the template’s GitHub.
Once you see this, click the Deploy button to deploy it!
Deploying Your First Container
When done, you’ll be redirected to the pipelines page, where you can see the deployed pipelines.

After doing this, head to the Environments tab and click Add Environment to the specific component you’re working with.
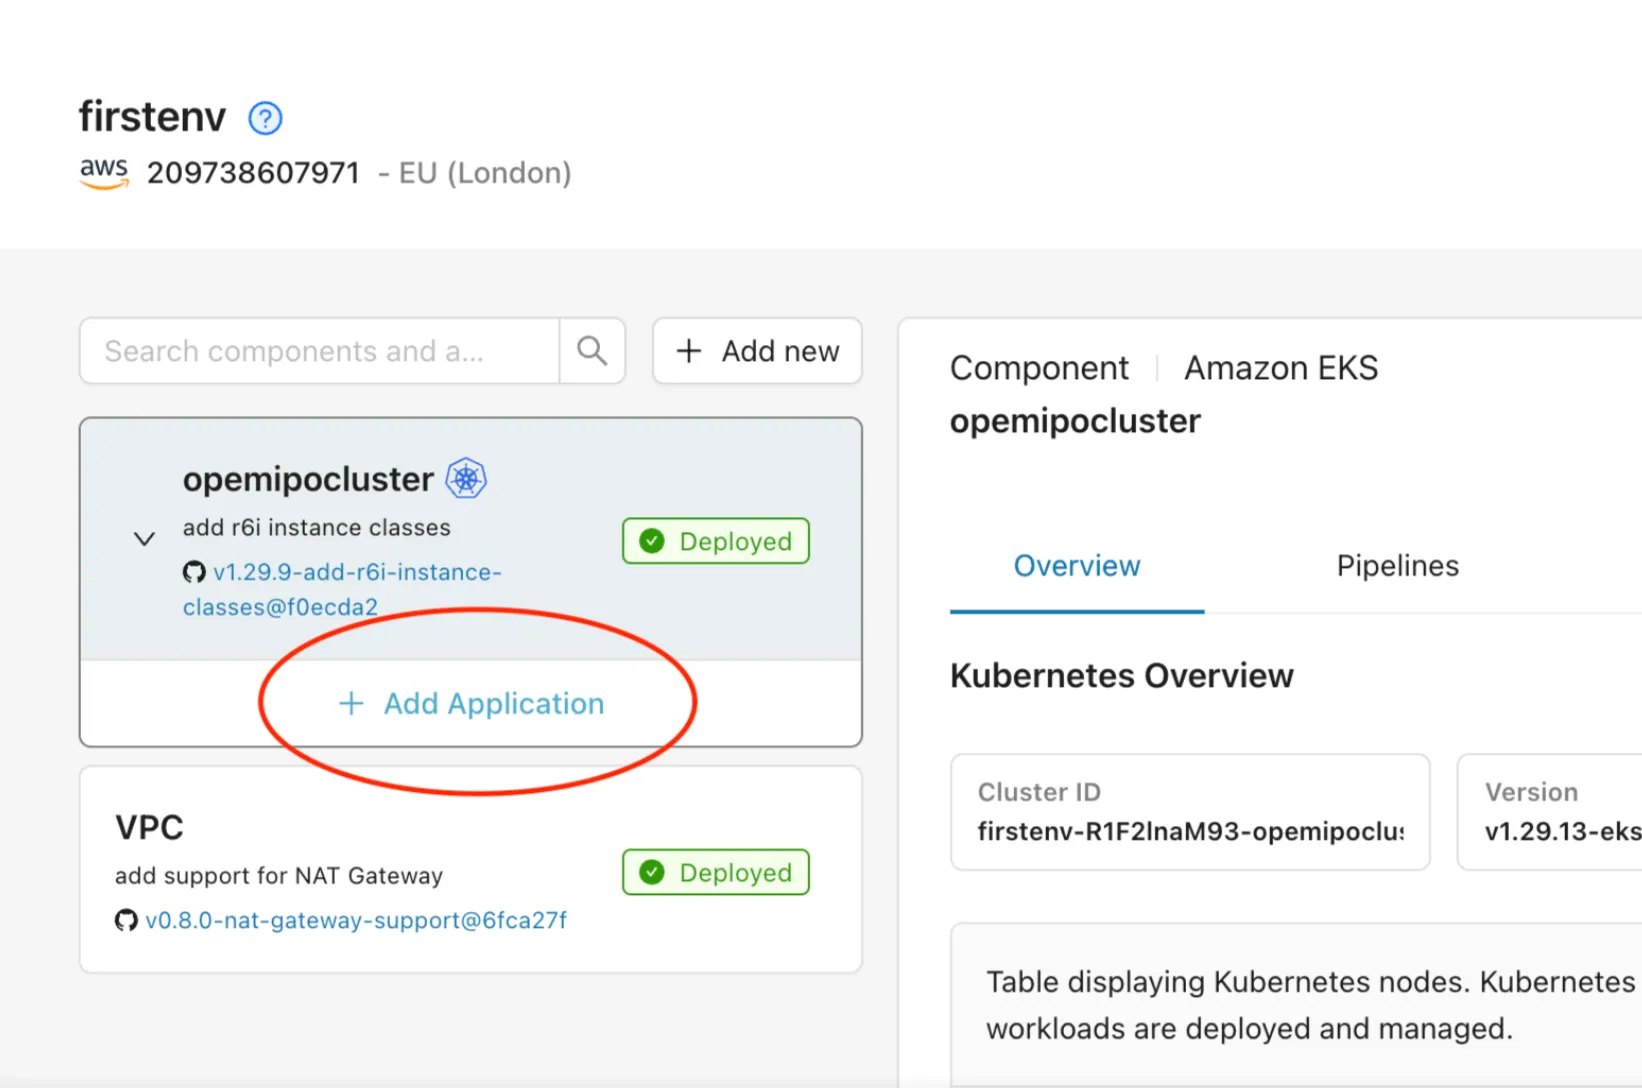
After clicking Add Application, a modal should pop up with a list of templates Microtica provides. In this article, we will be working with the Next.js template.
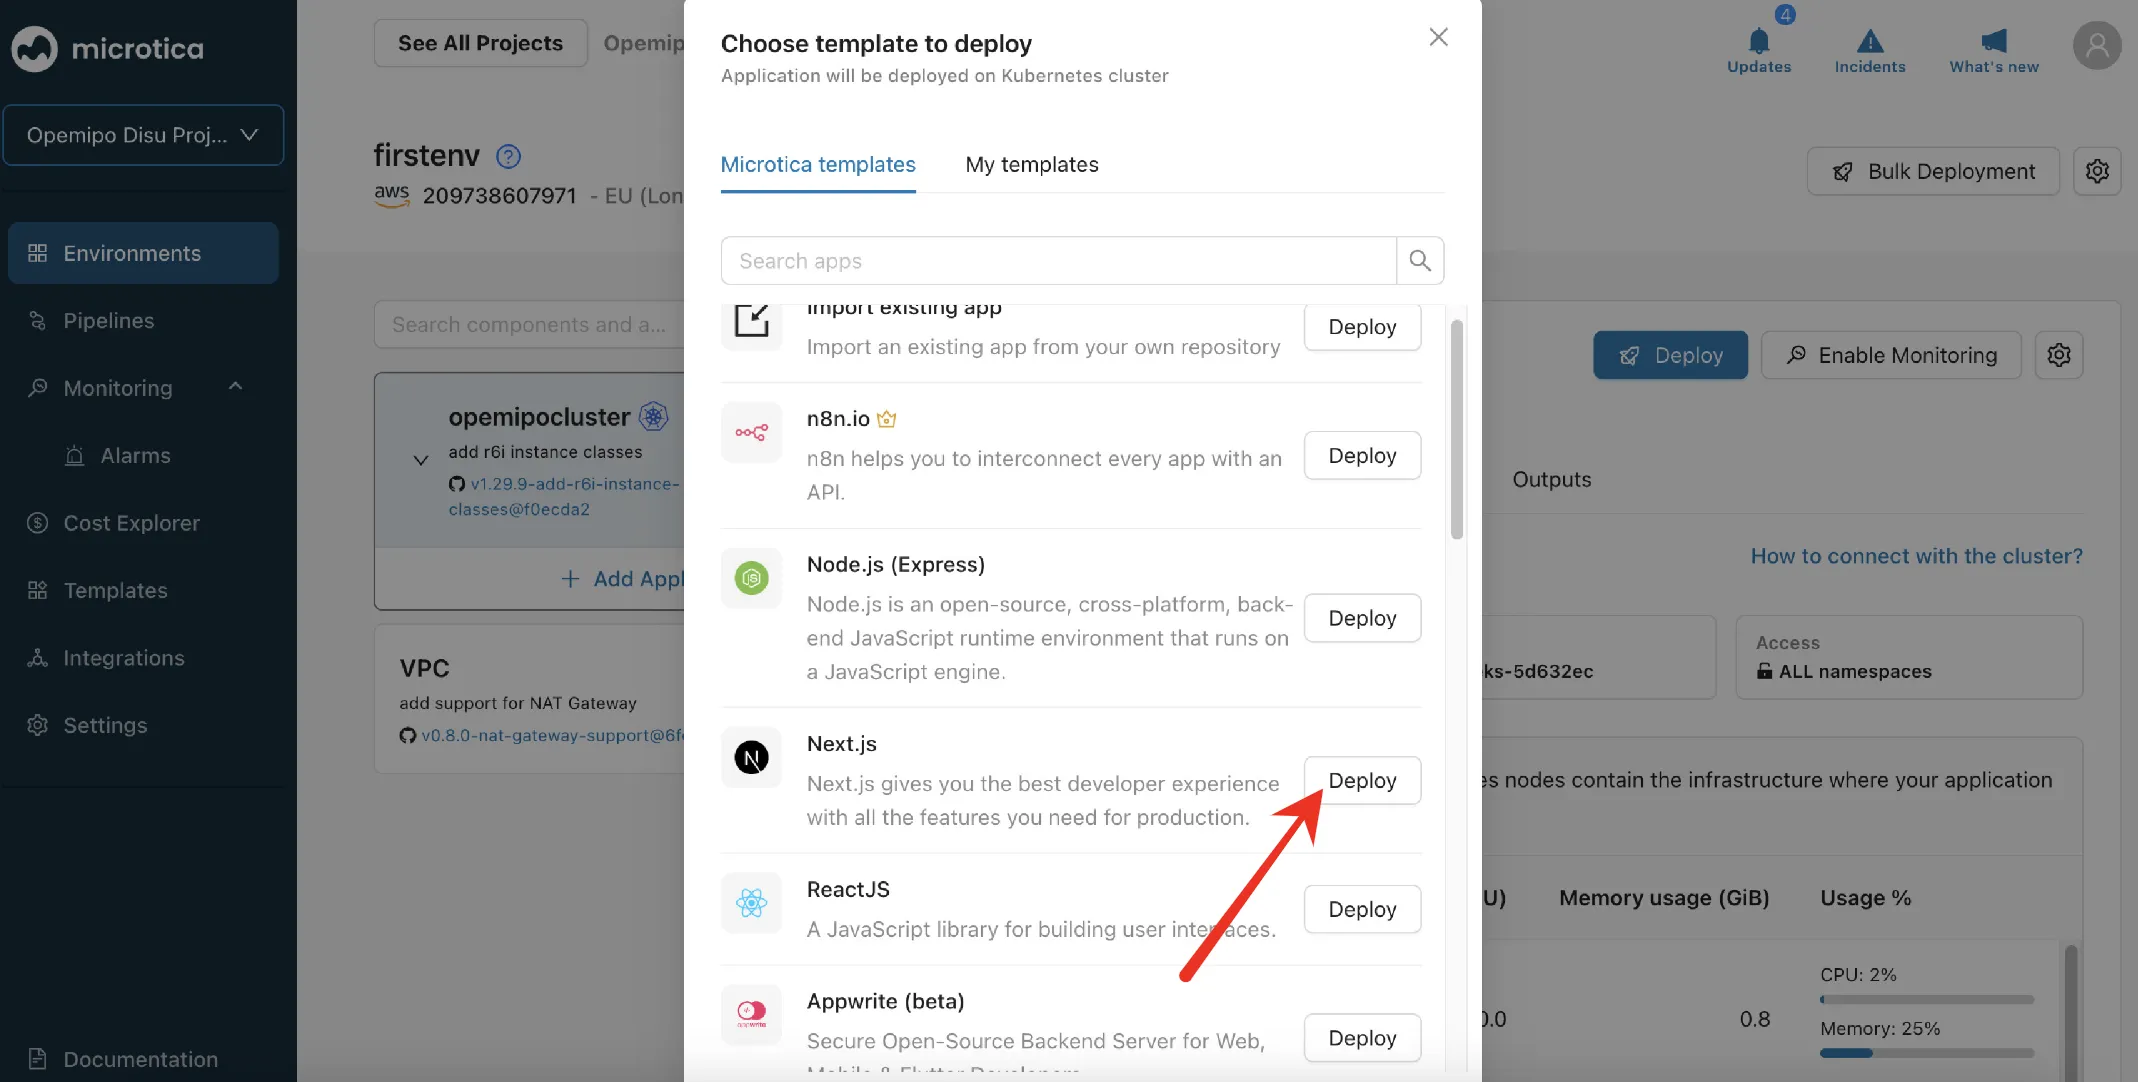
After clicking the Deploy button, you’ll be redirected to the next deployment steps, which involve creating a Git repository, configuring the template, choosing where to deploy, and finally deploying. 🚀

Here are some things to do after clicking the Next button:
- Give the application a name in the AppName input field.
- When selecting where to deploy, select the Cluster you’d love to work with. In this case, we will work with the one we created earlier.
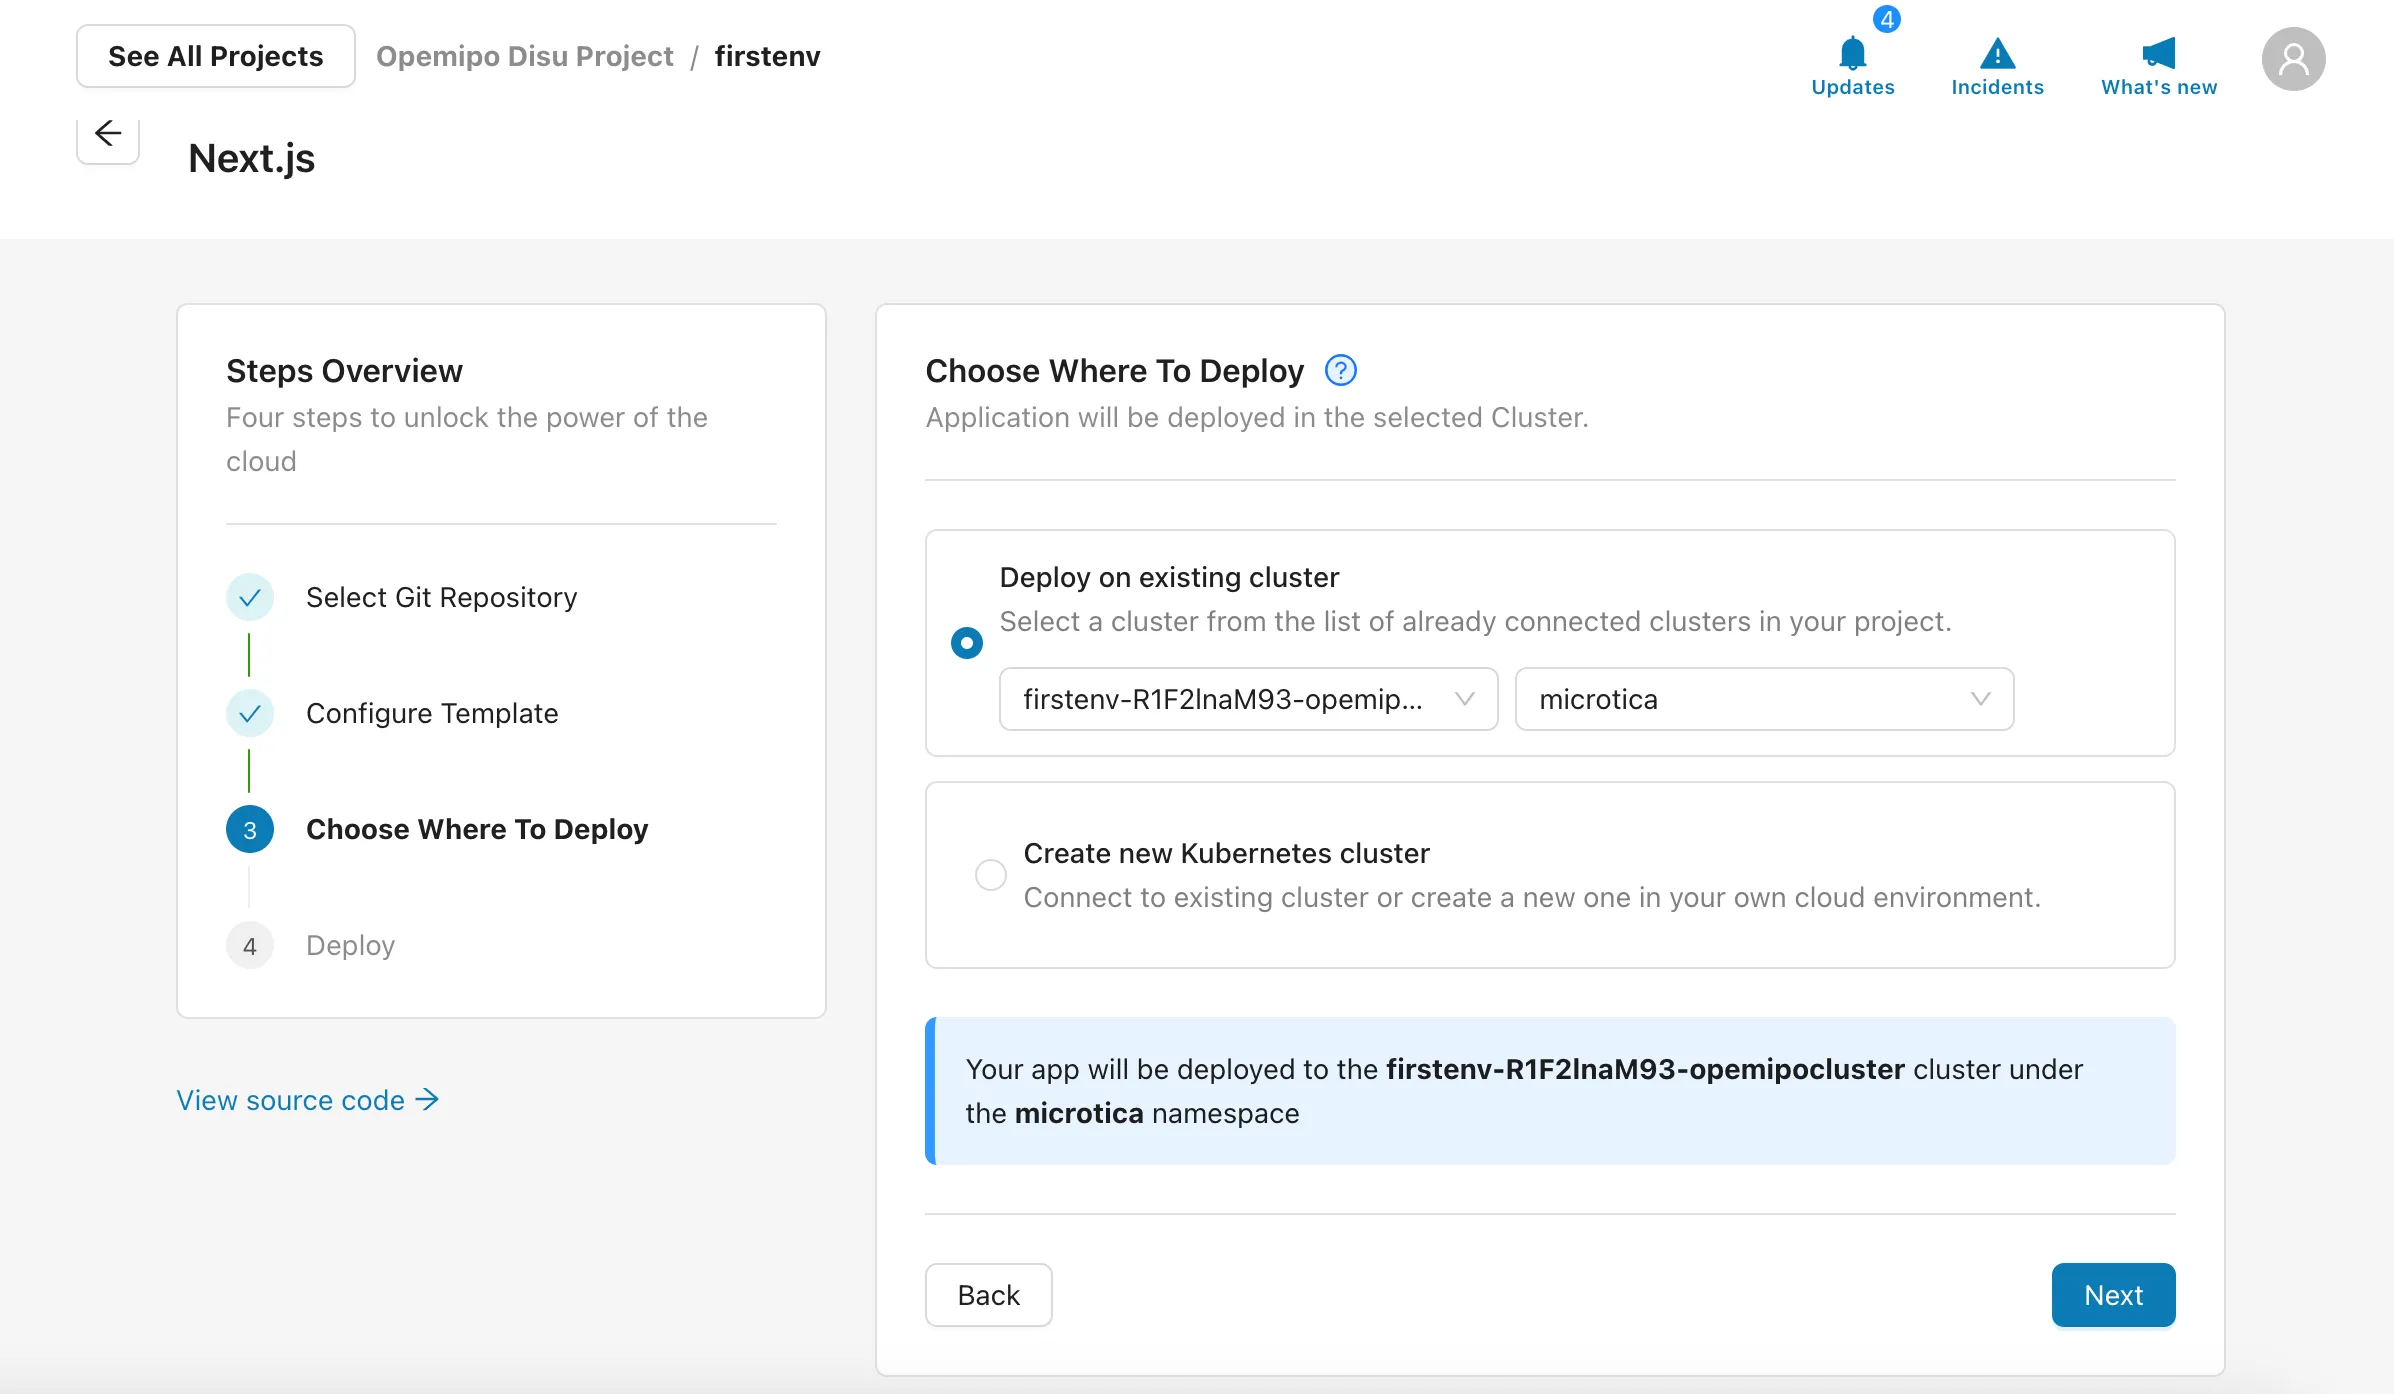
- Click Next, and Deploy your application to the cluster.
Wait for the application to build before deploying it. To verify that it’s building, you can check the logs to see what’s happening.
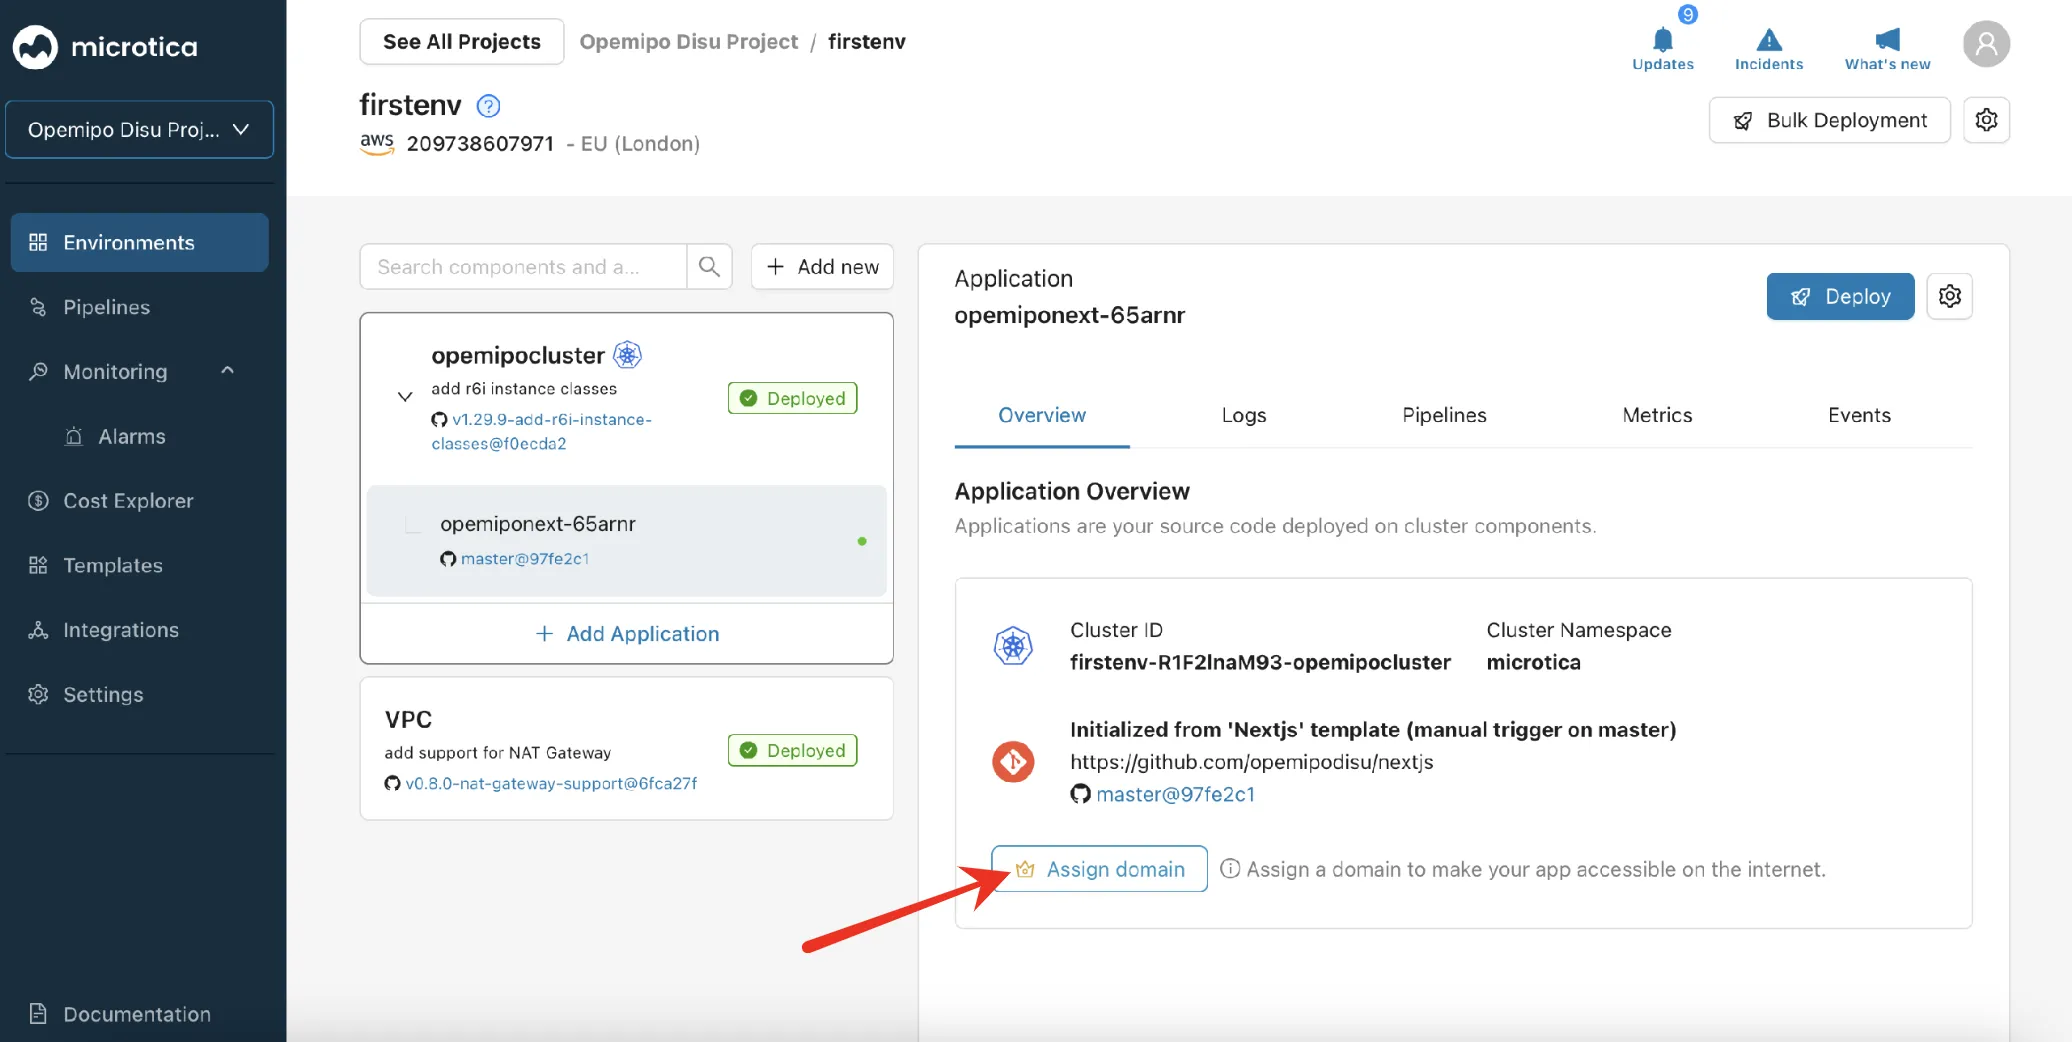
When it’s done building, you can head over to the Environments tab to see what’s happening.
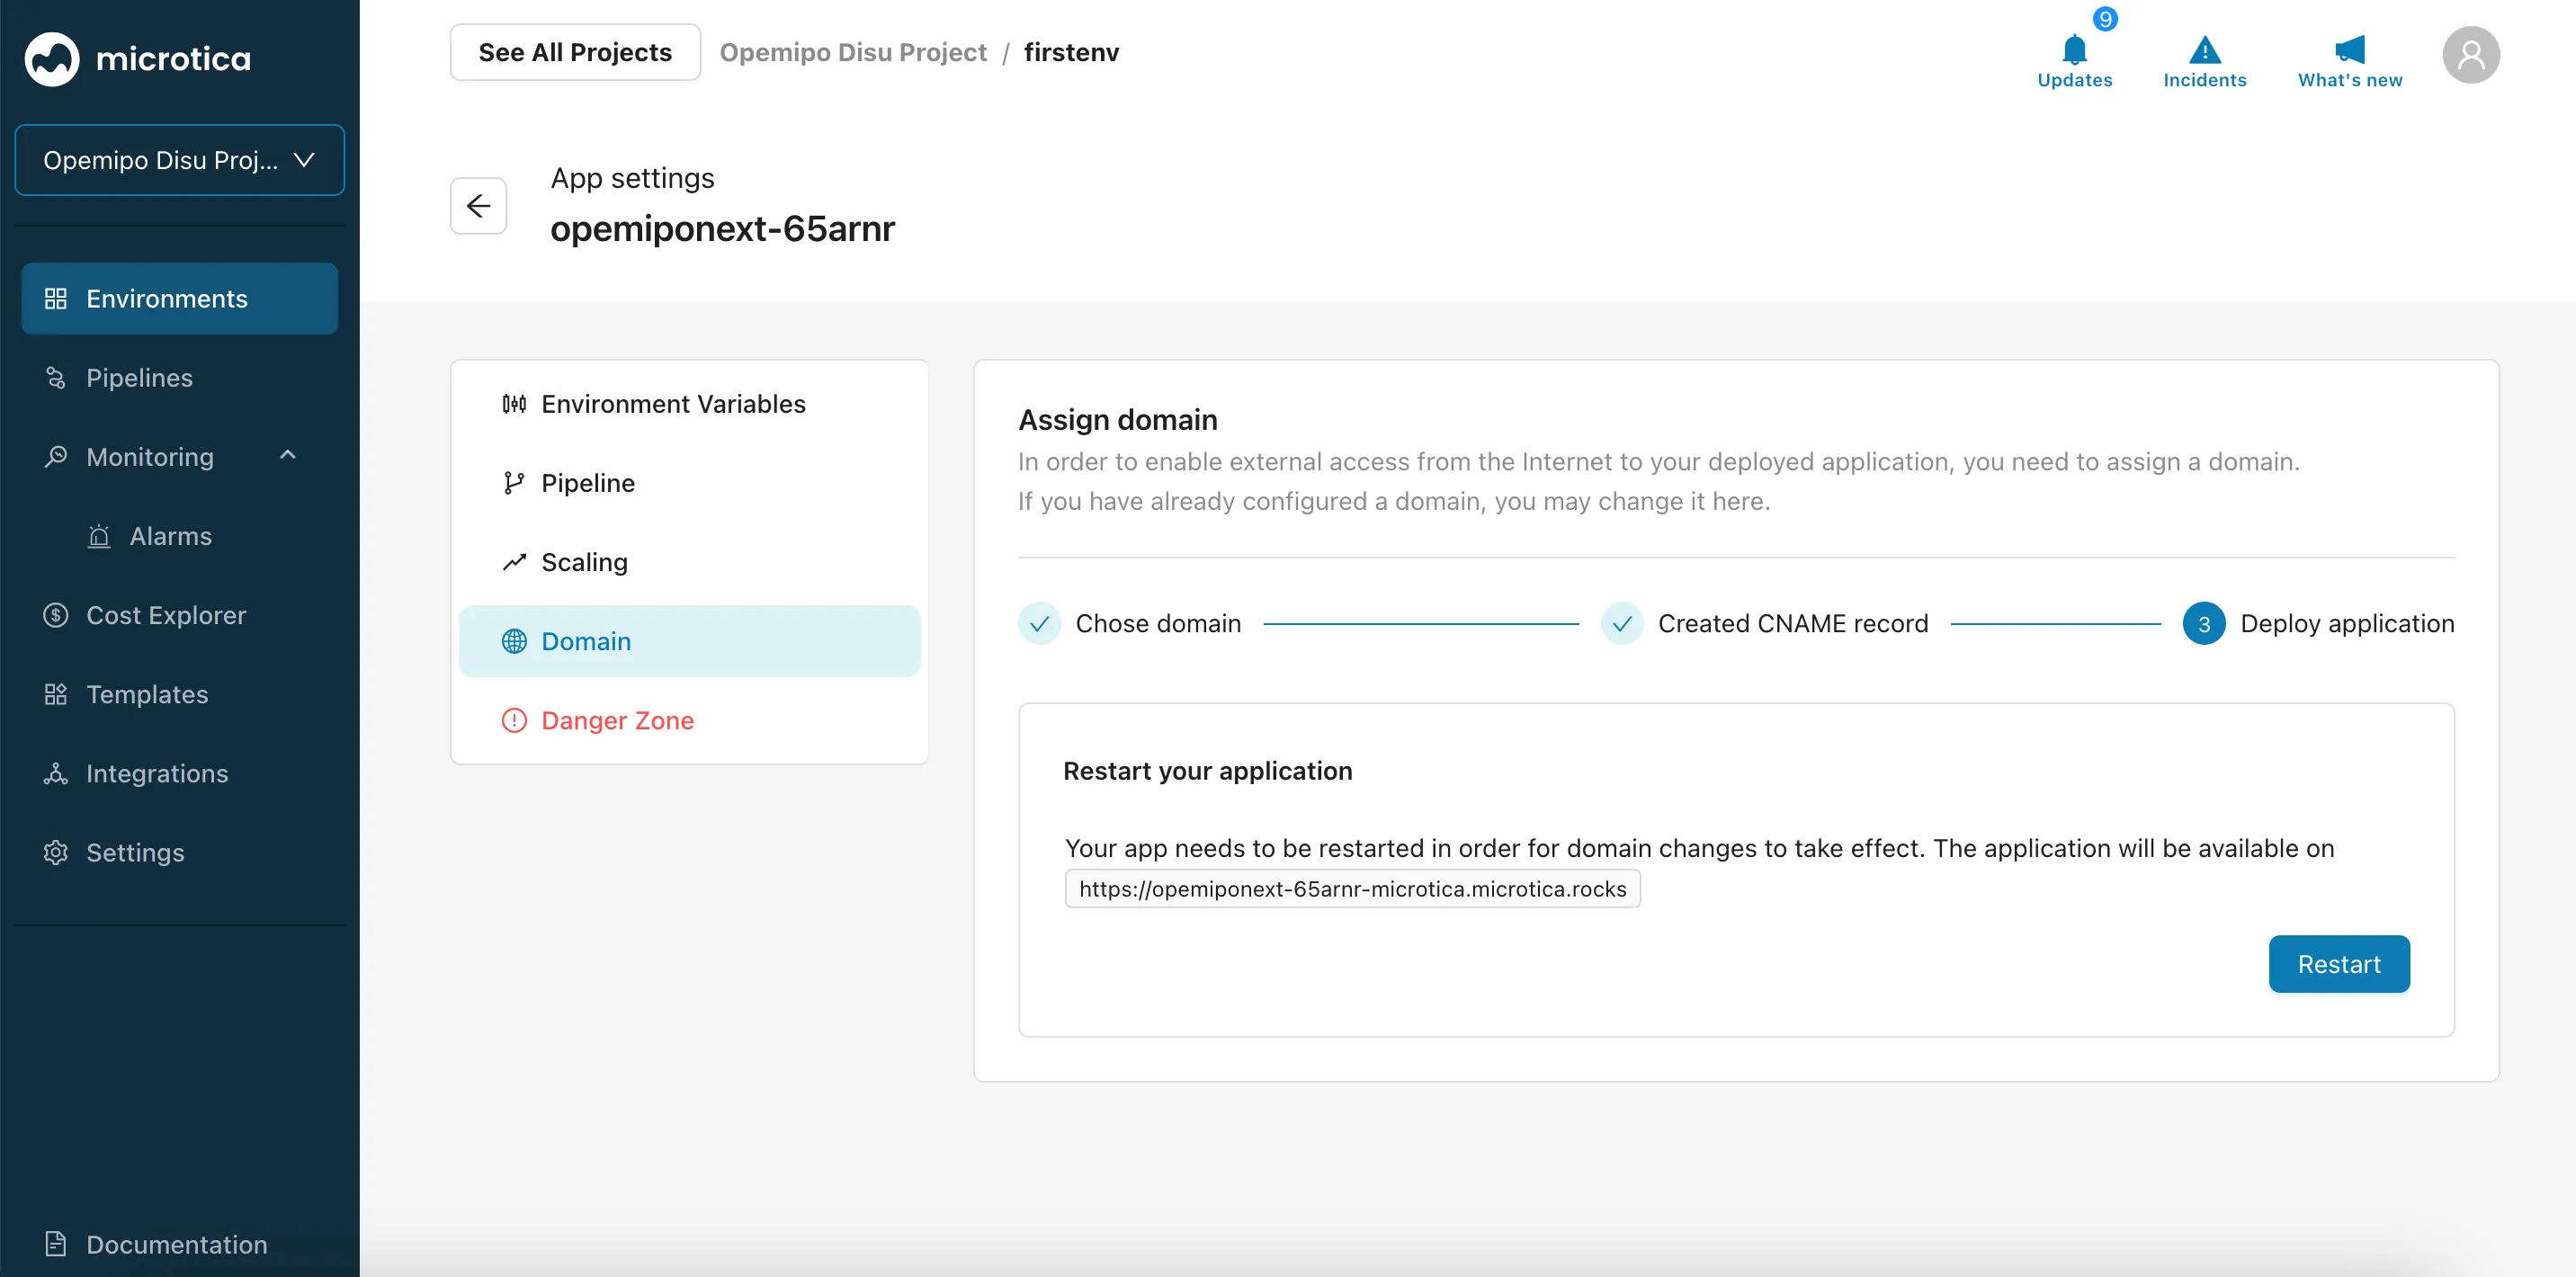
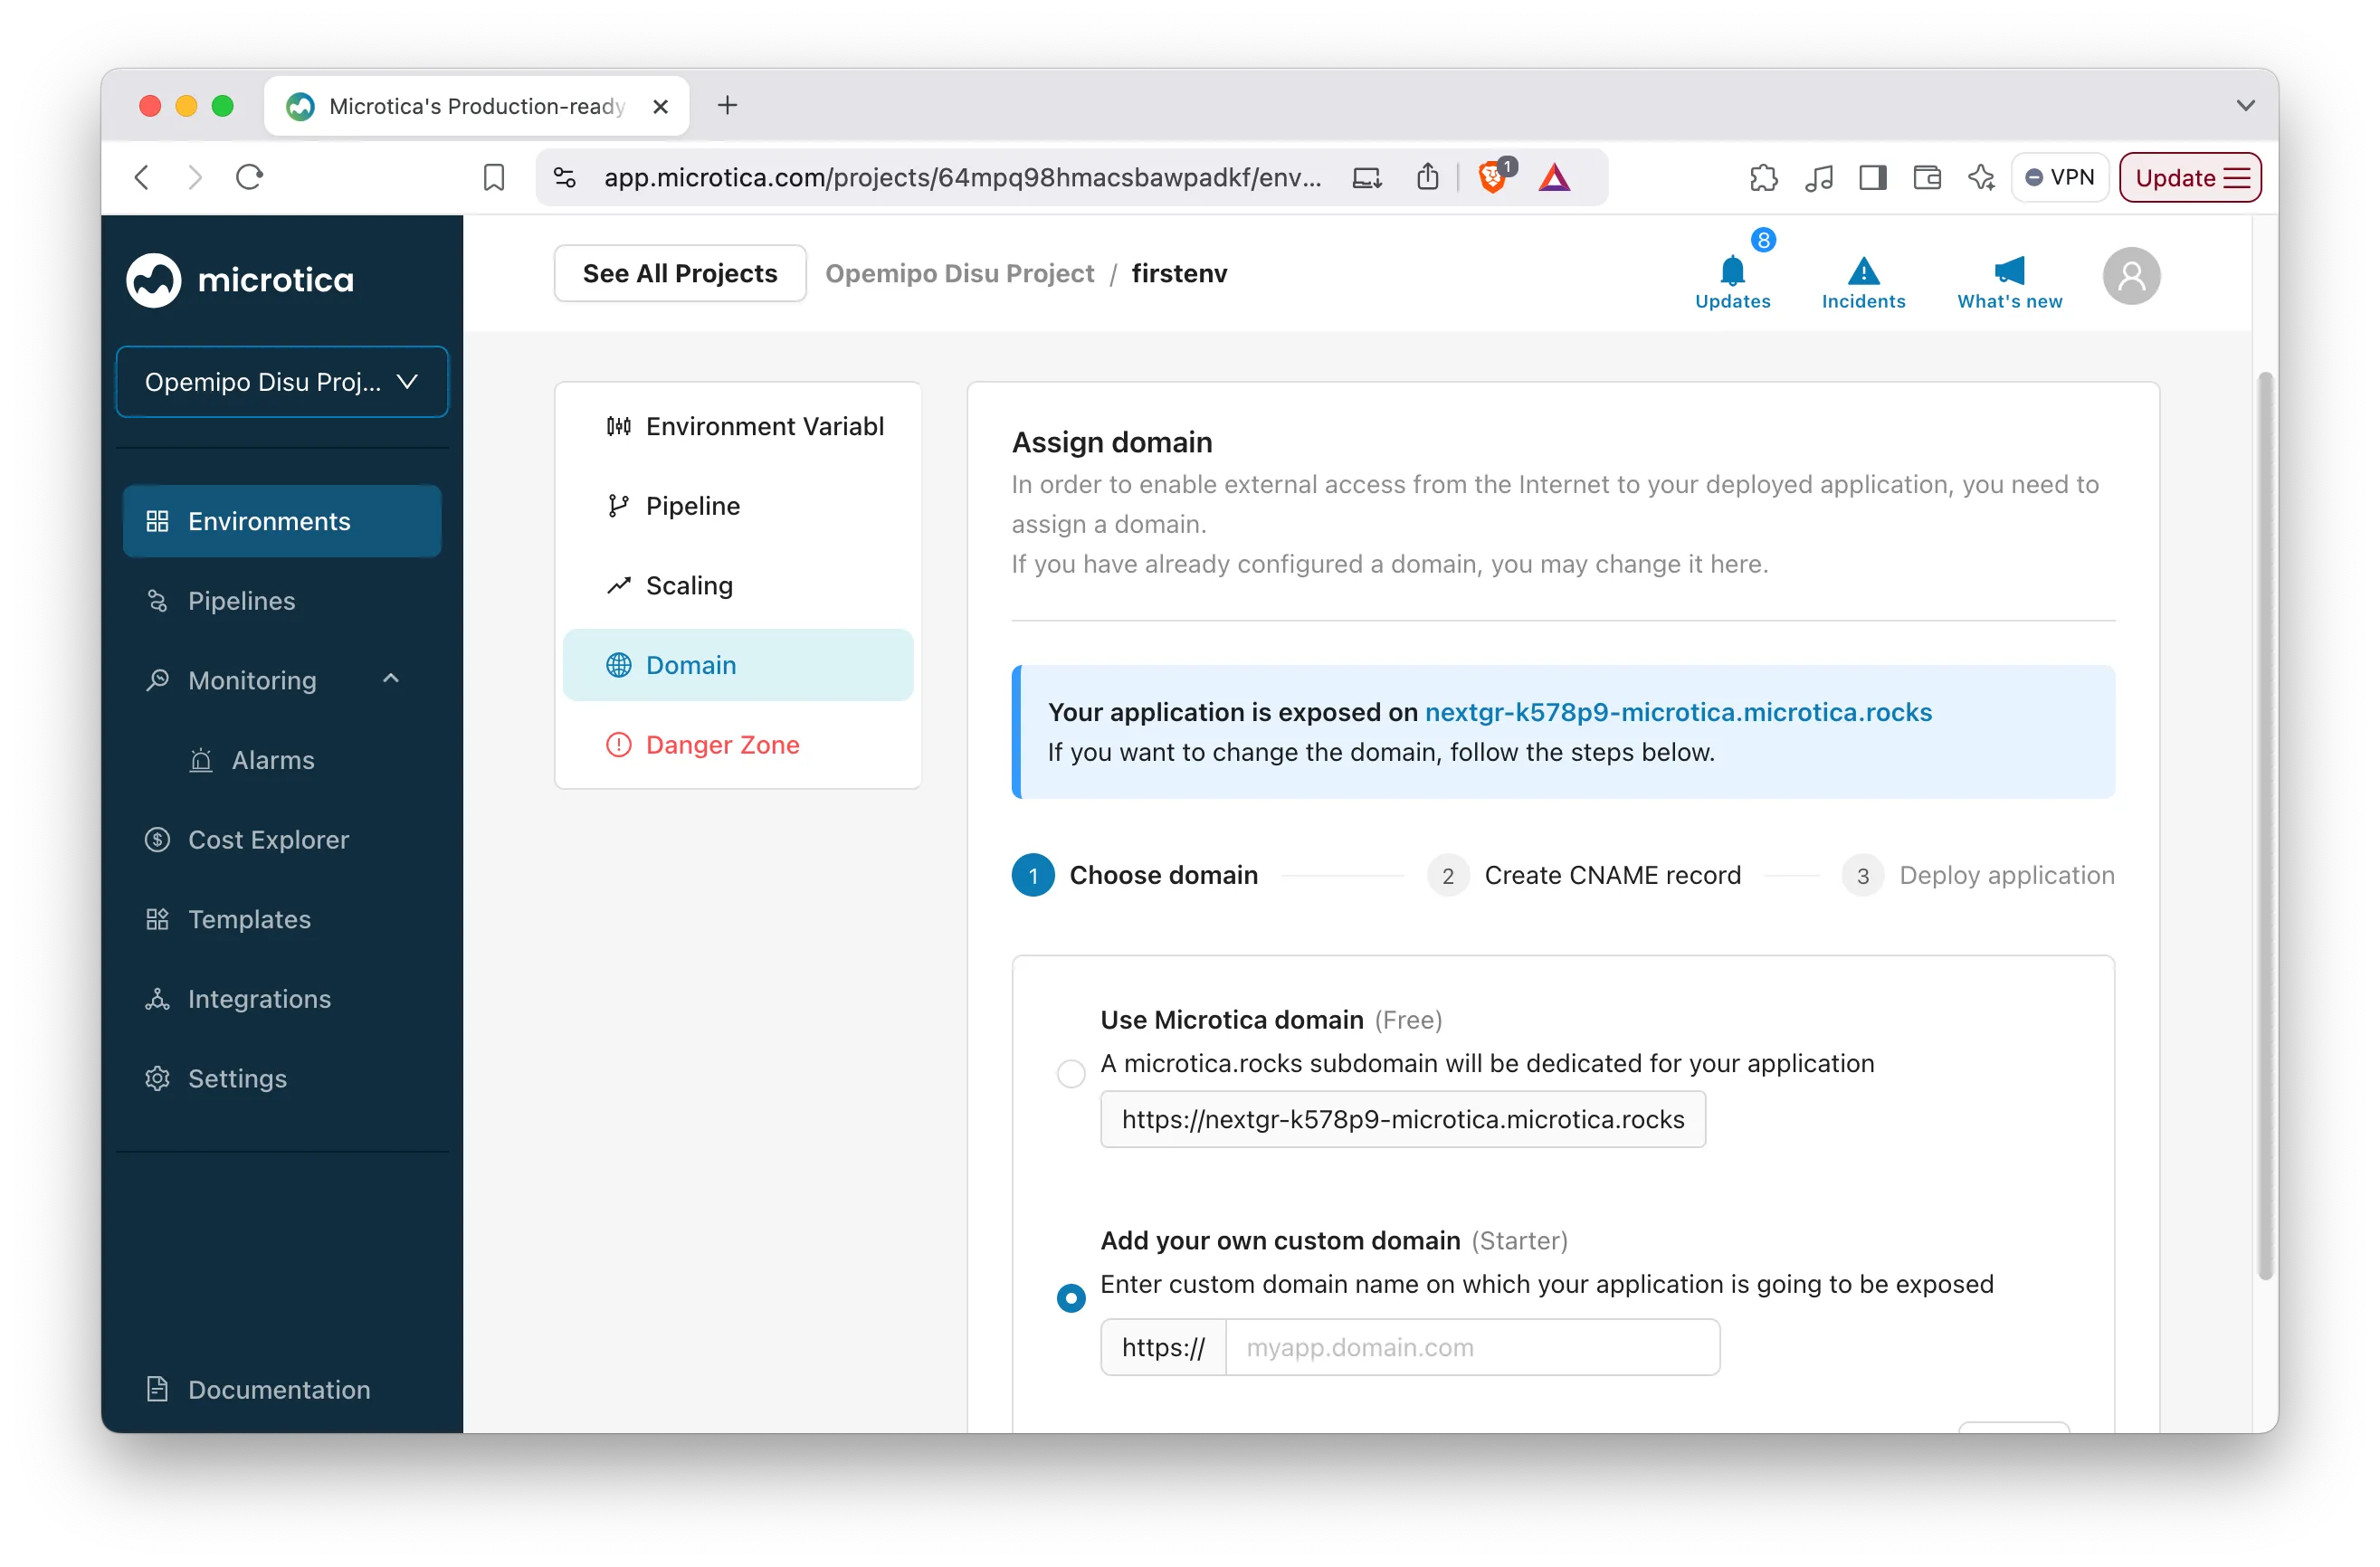
Head over to the application in the cluster component and click the Assign domain button to create a domain where your application will be deployed.
Microtica offers a free domain, you can use that if you want. Alternatively, you can add your custom domain. Click the Next button when you’re done with any of these.
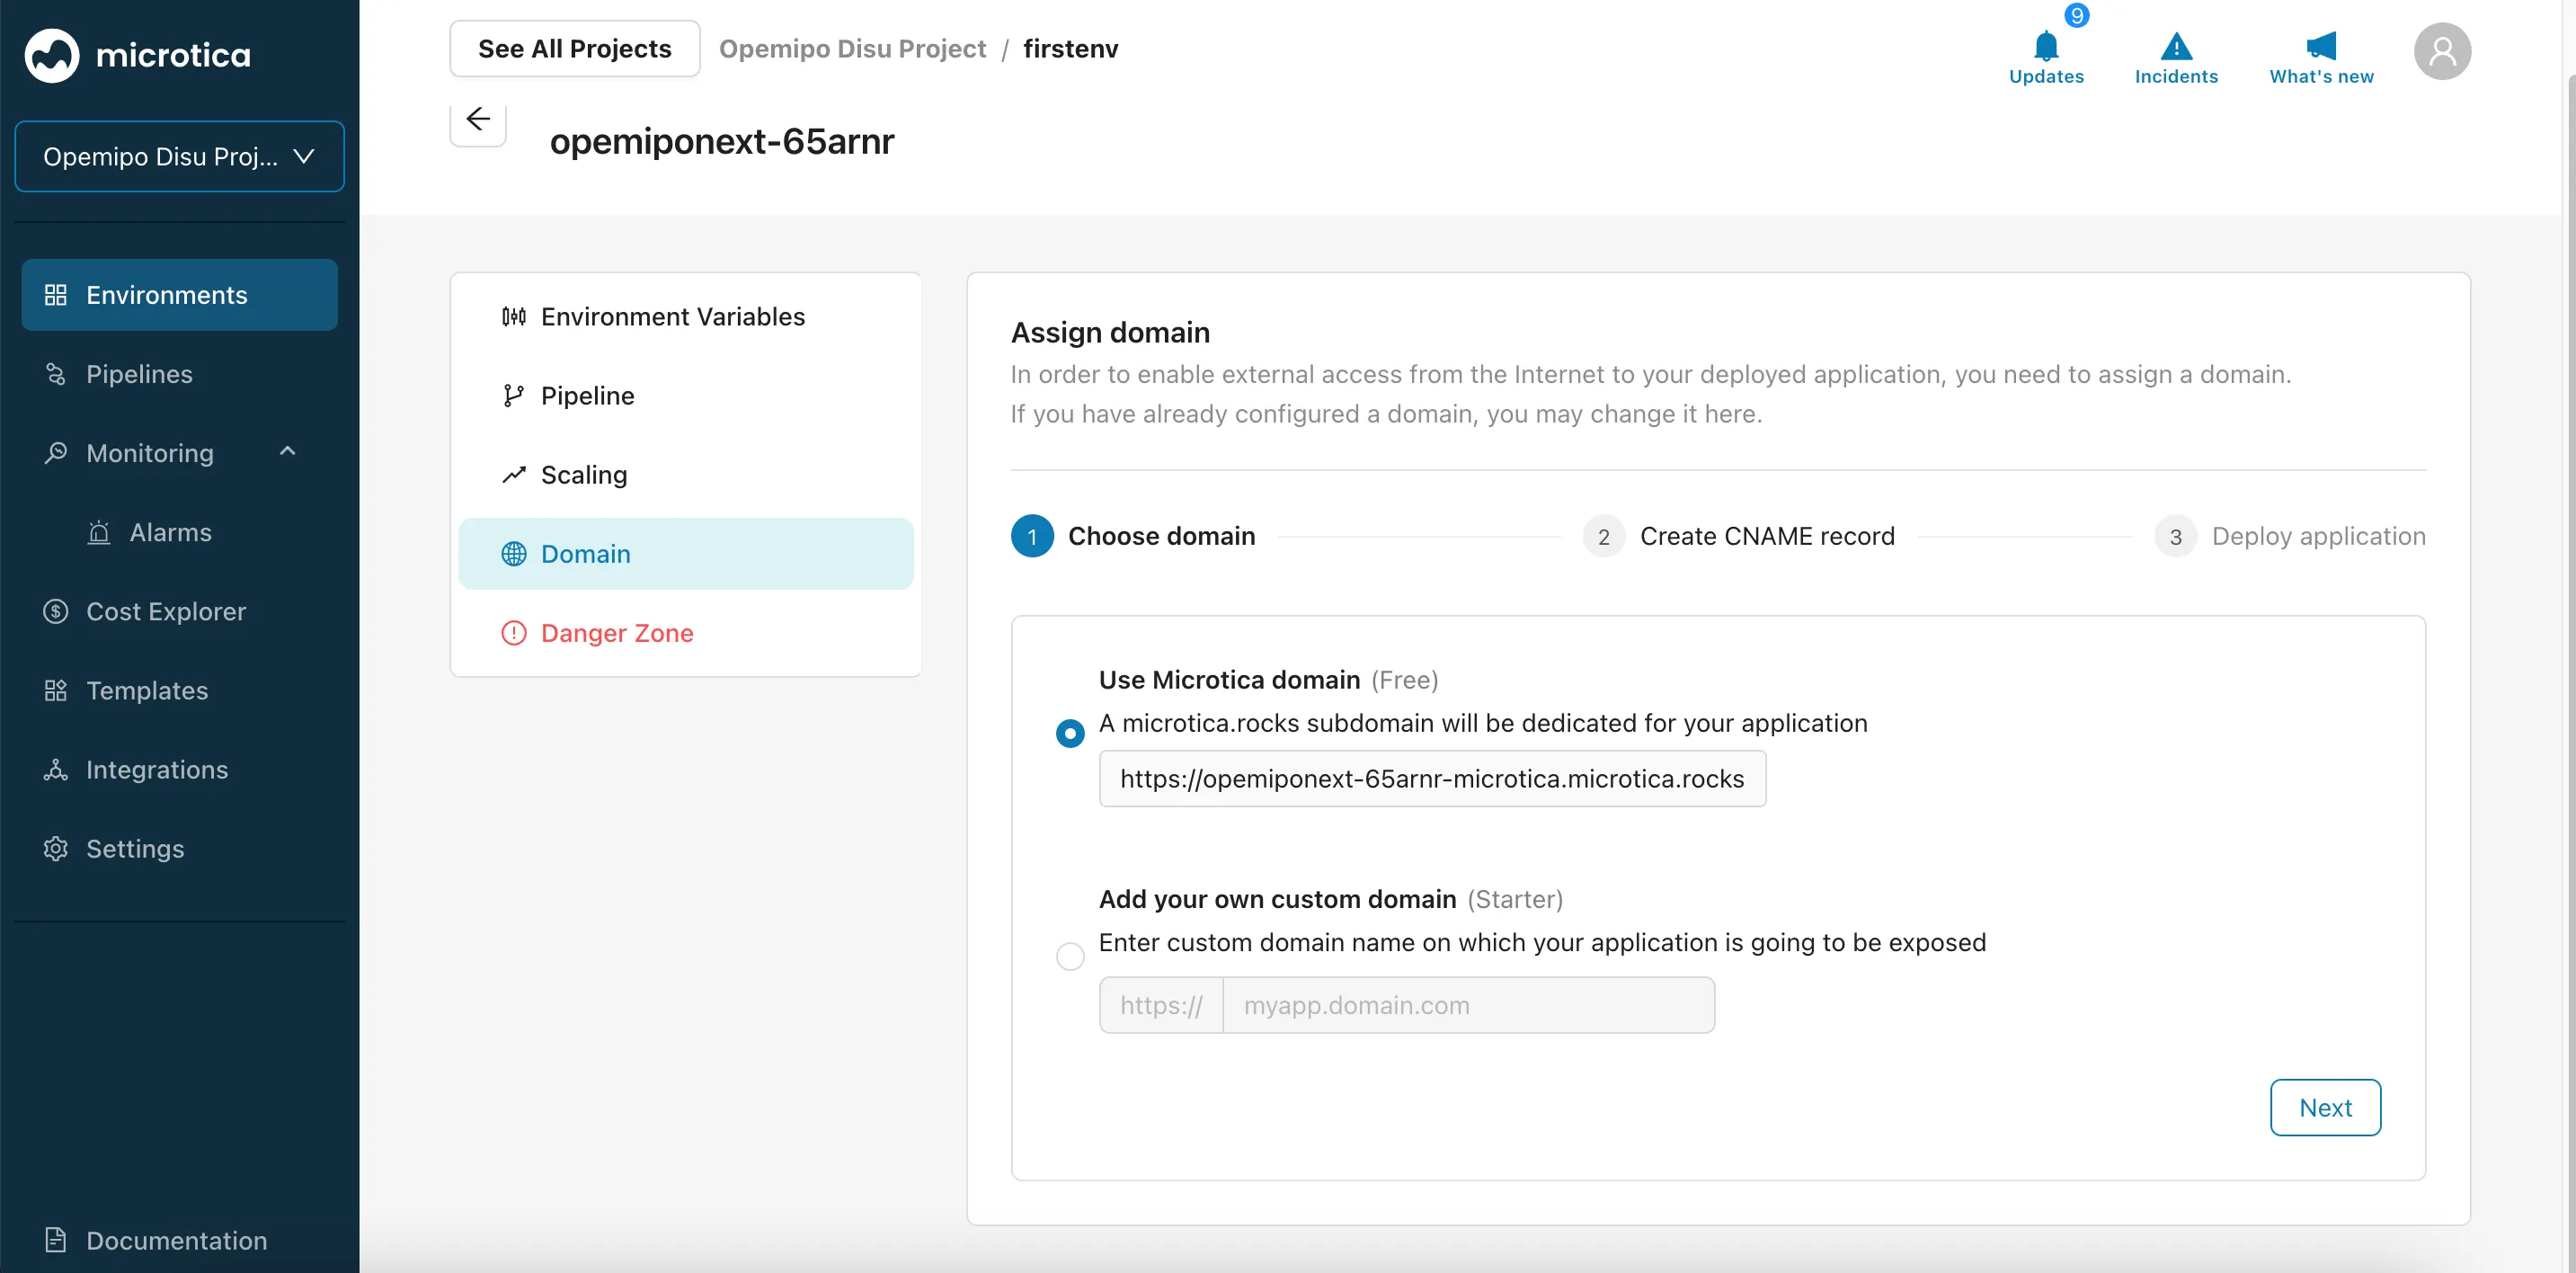
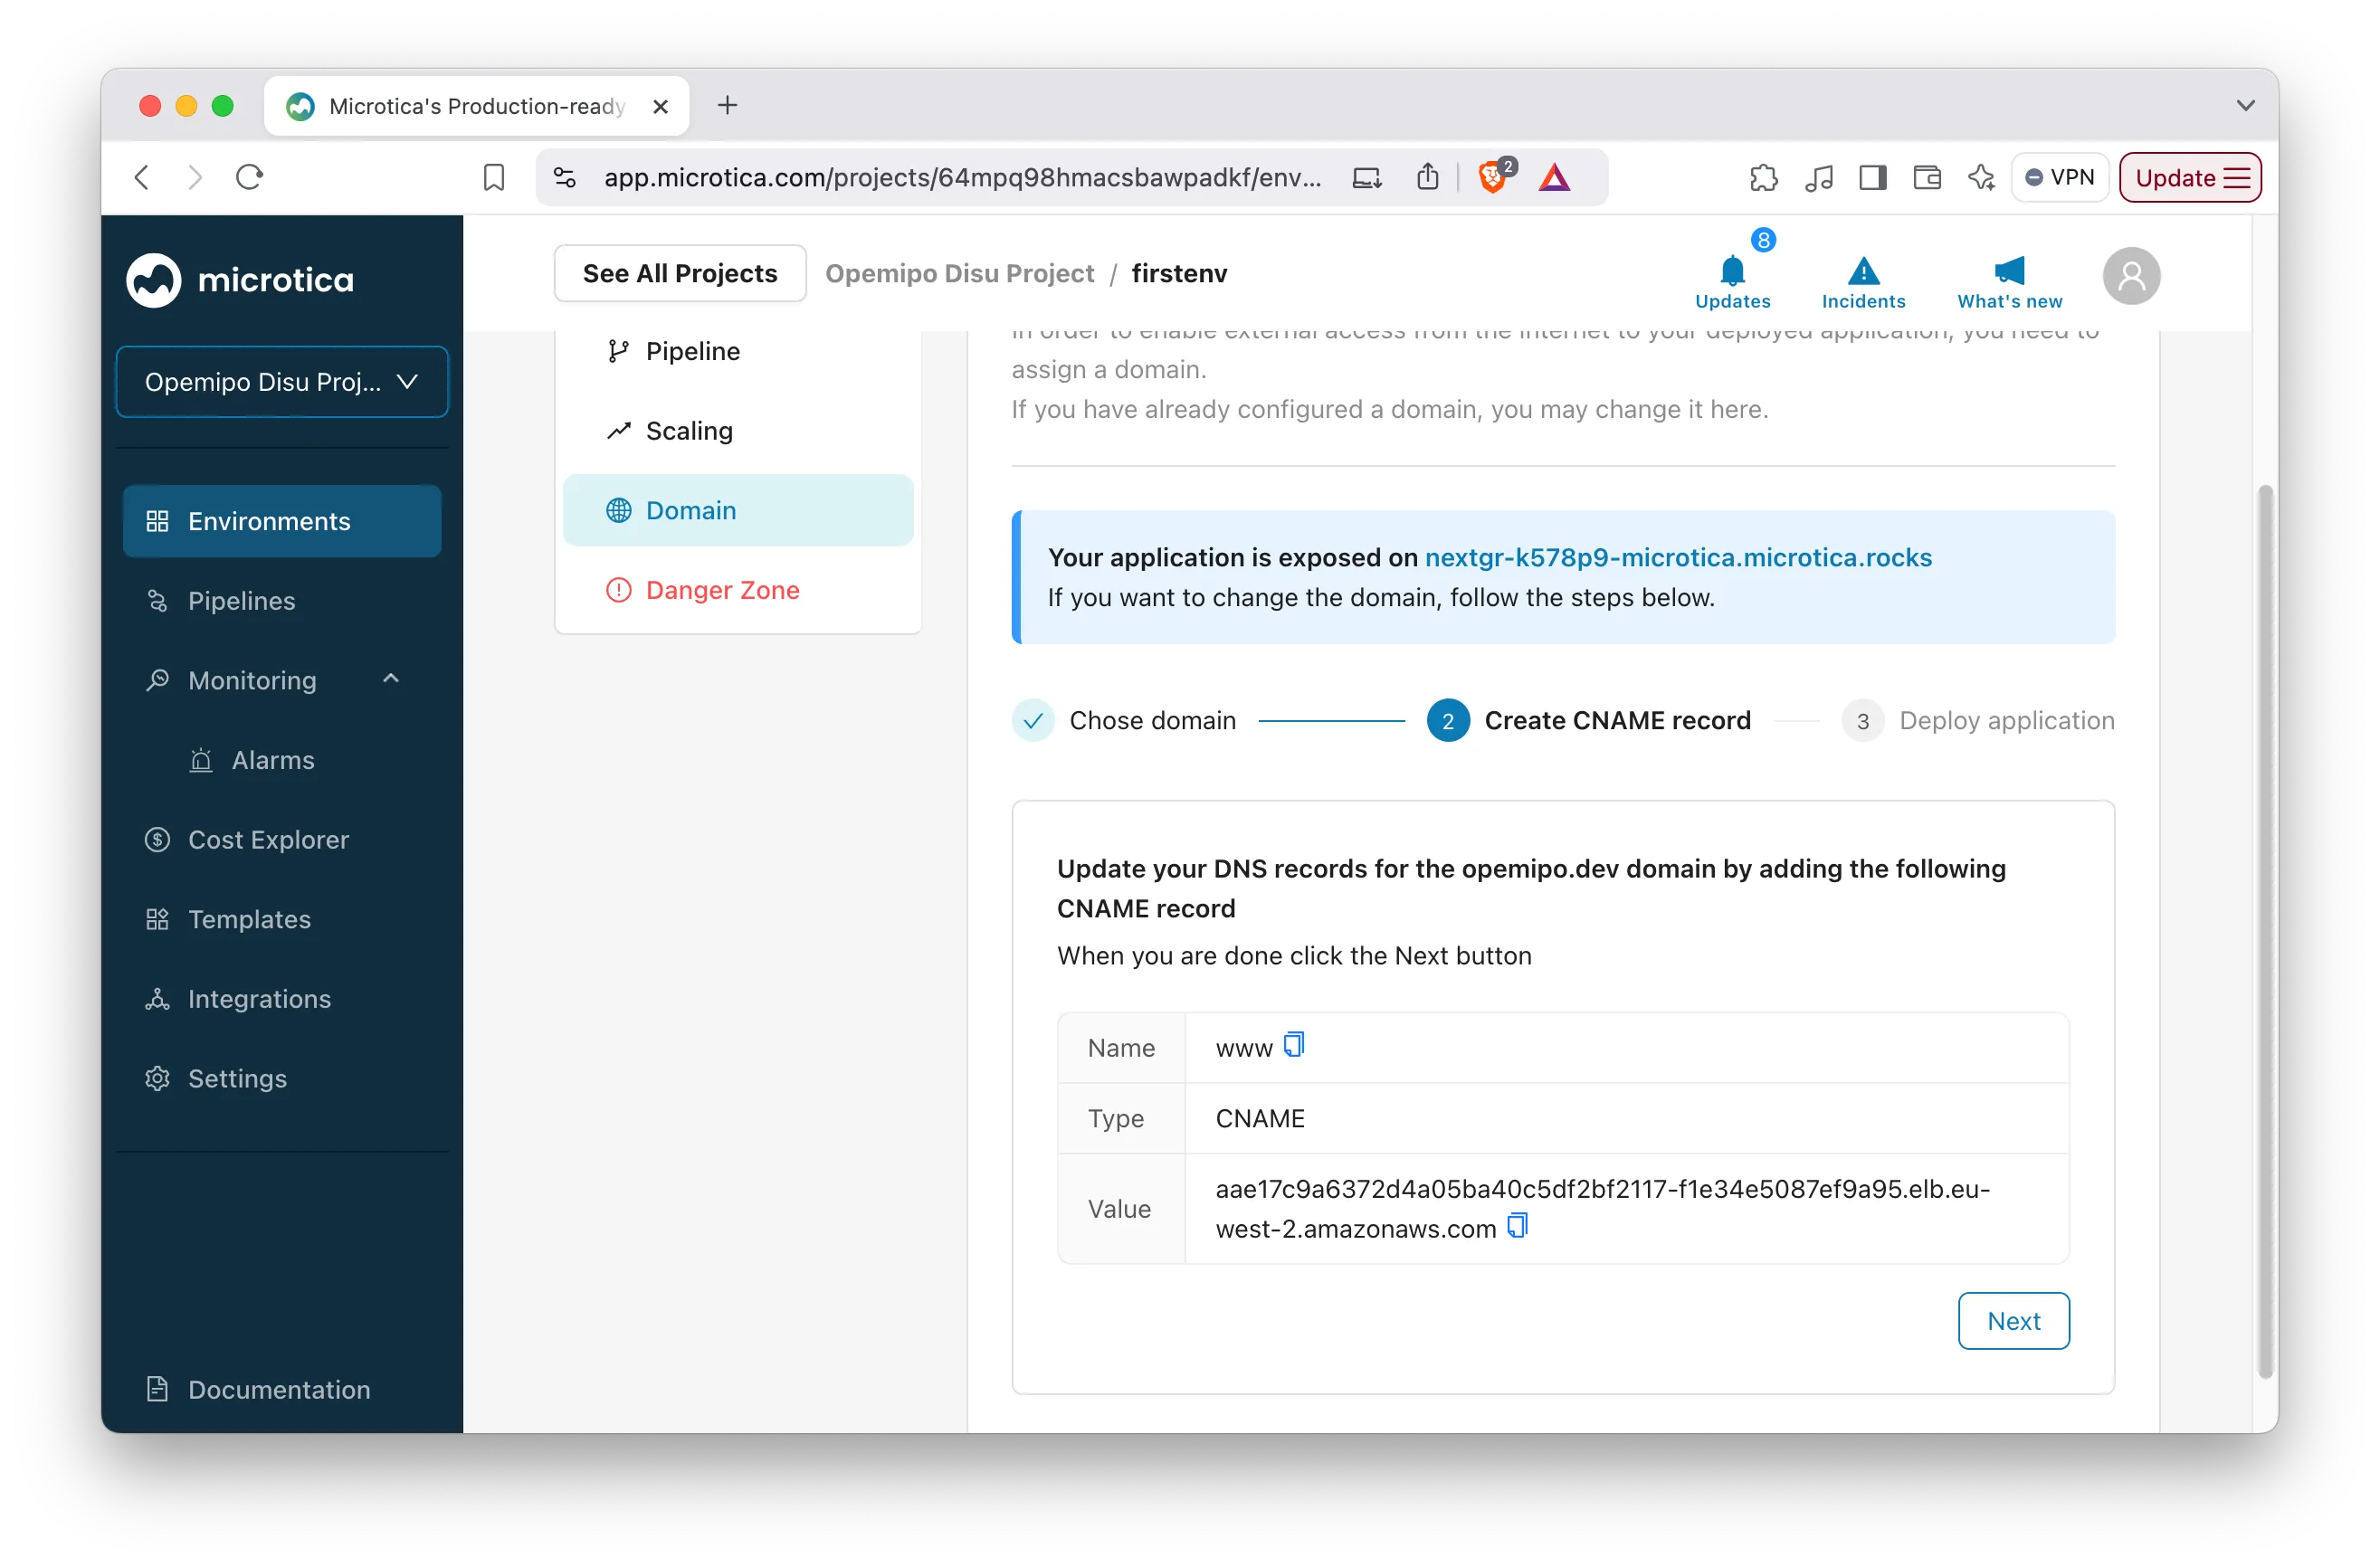
After clicking the button, a CNAME record for your domain will be created for you automatically if you’re working with the free domain.
If you’re using a custom domain, you might need more configurations to set a CNAME record. In this guide, we’re working with a free domain, which automatically creates a CNAME record.
Afterward, you'll need to restart your application for it to be deployed. Click the Restart button to do this.
Once restarted, head over to the Environments tab and check the application to view the domain.
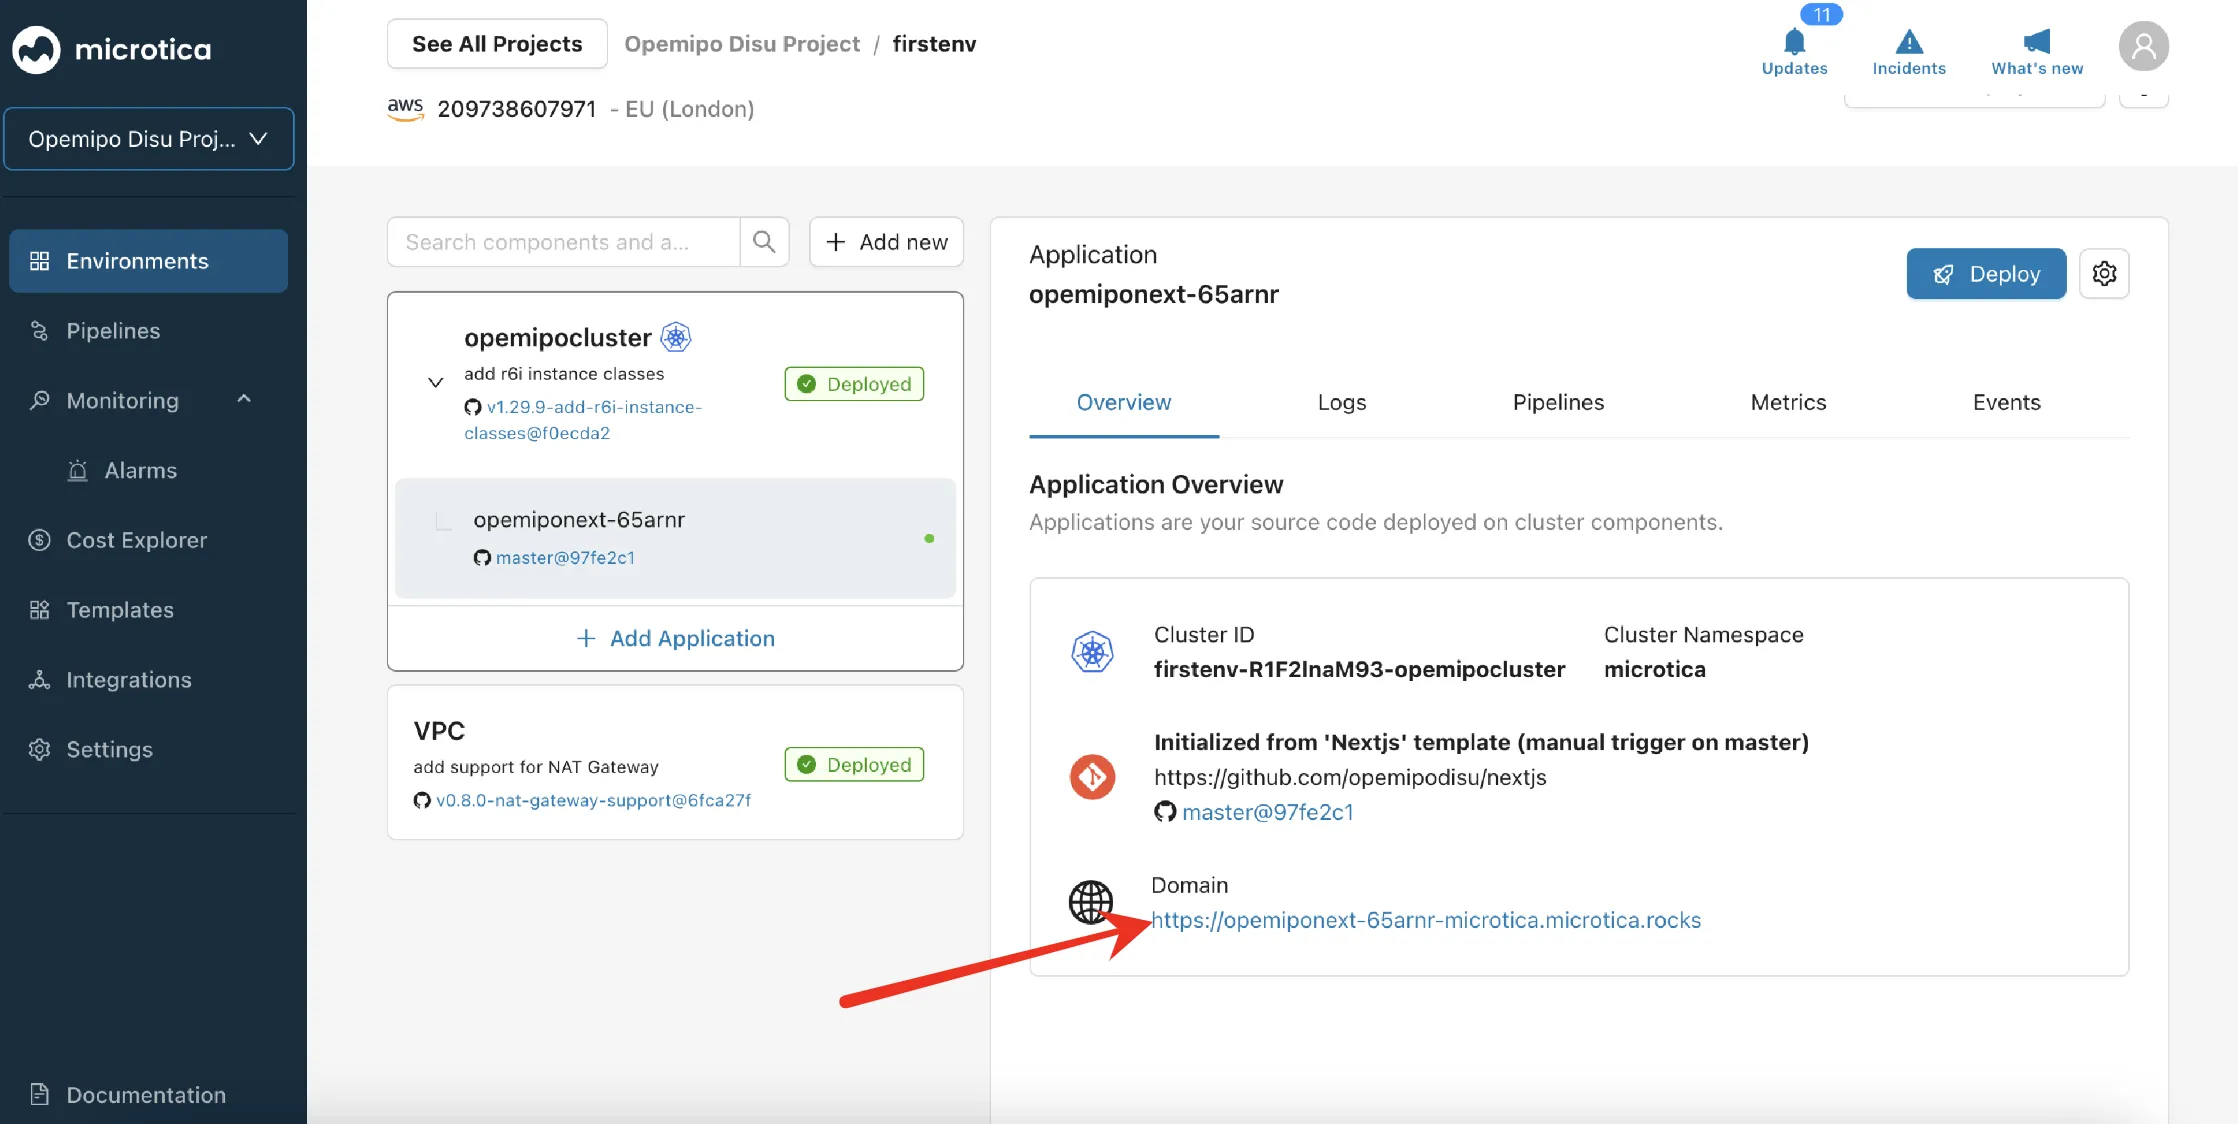
Once done, click the domain, and you should see Next.js’s default page.
Now, you have your application deployed in the Cluster! ☁️ 🚀
Managing and Scaling Deployed Applications
In Microtica, you don’t need to use third-party tools to observe or monitor your application’s health, performance, memory, etc. However, it’s great to keep track of your application and its potential capabilities, as this saves you from the stress and potential risks of slowing down the application’s performance.
Also, Microtica's Cost Explorer feature helps you scale your applications and save costs on cloud infrastructure and deployment.
In this section of the article, we will explore how to manage, scale, and save costs for the cloud.
Monitoring Application’s Performance
Microtica has an integrated monitoring tool on the platform - we’ll be using it in this section of the article.
To monitor your application, you need to enable monitoring for your Cluster. To get this done, head to the Cluster, and enable monitoring.
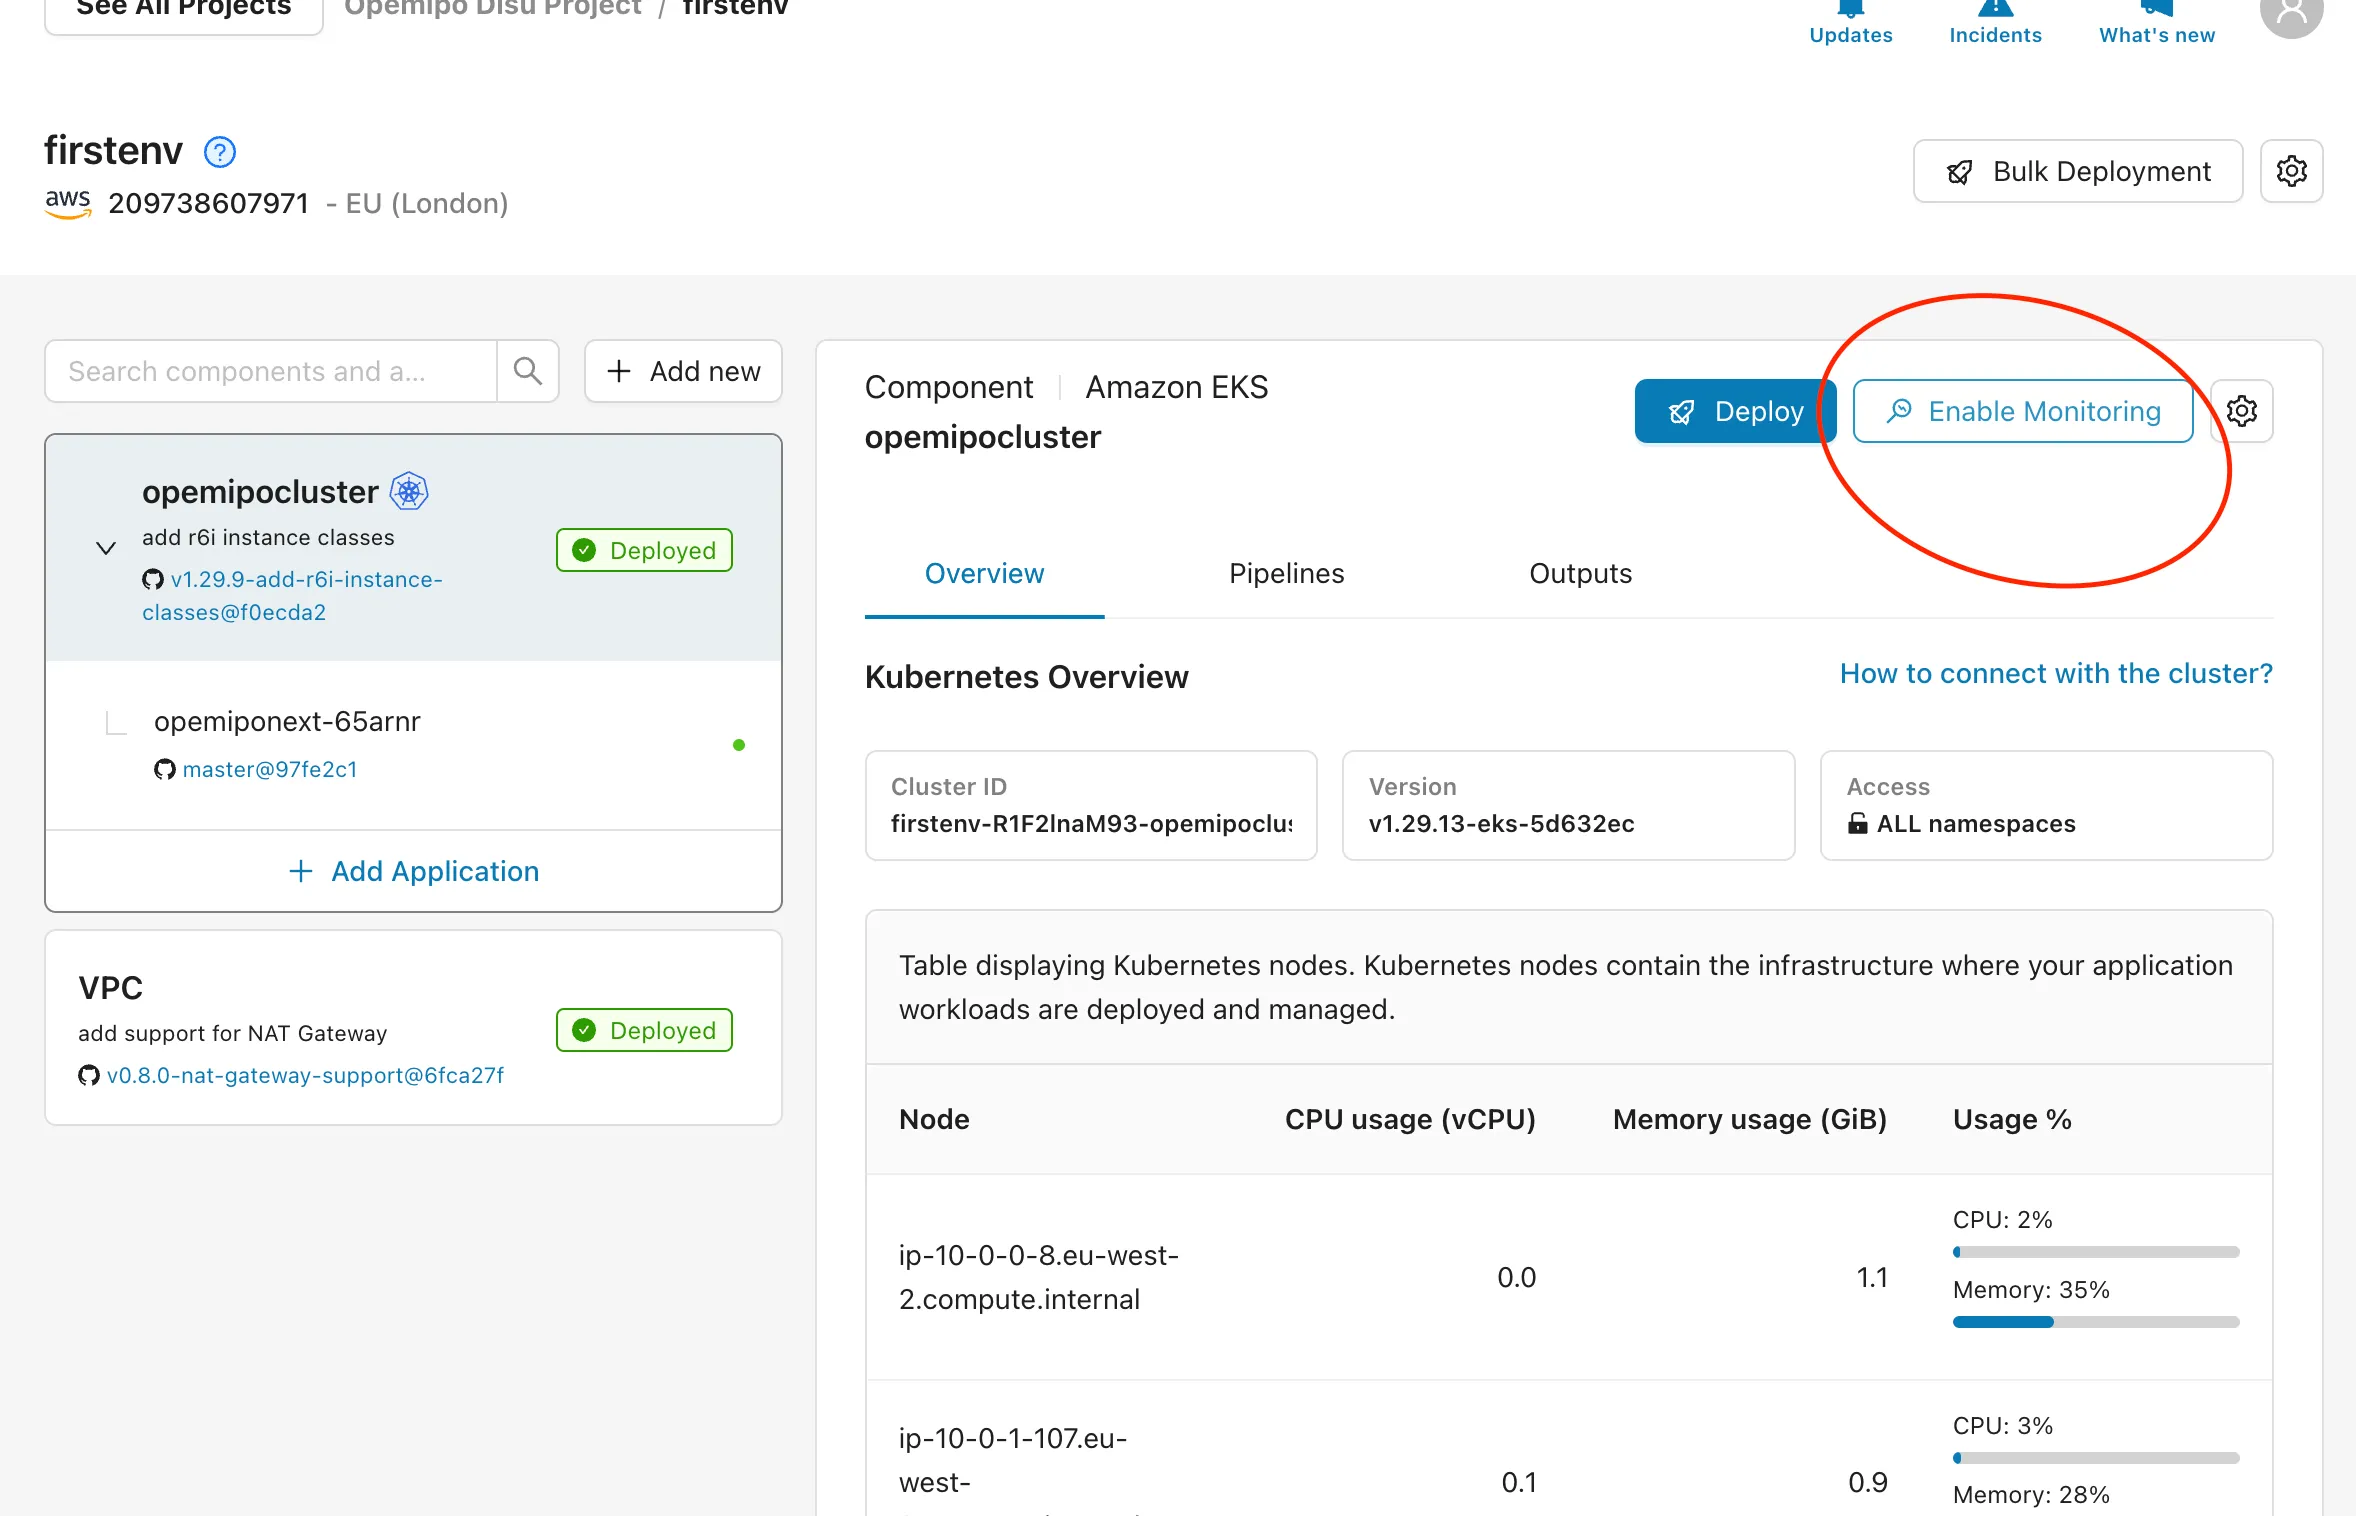
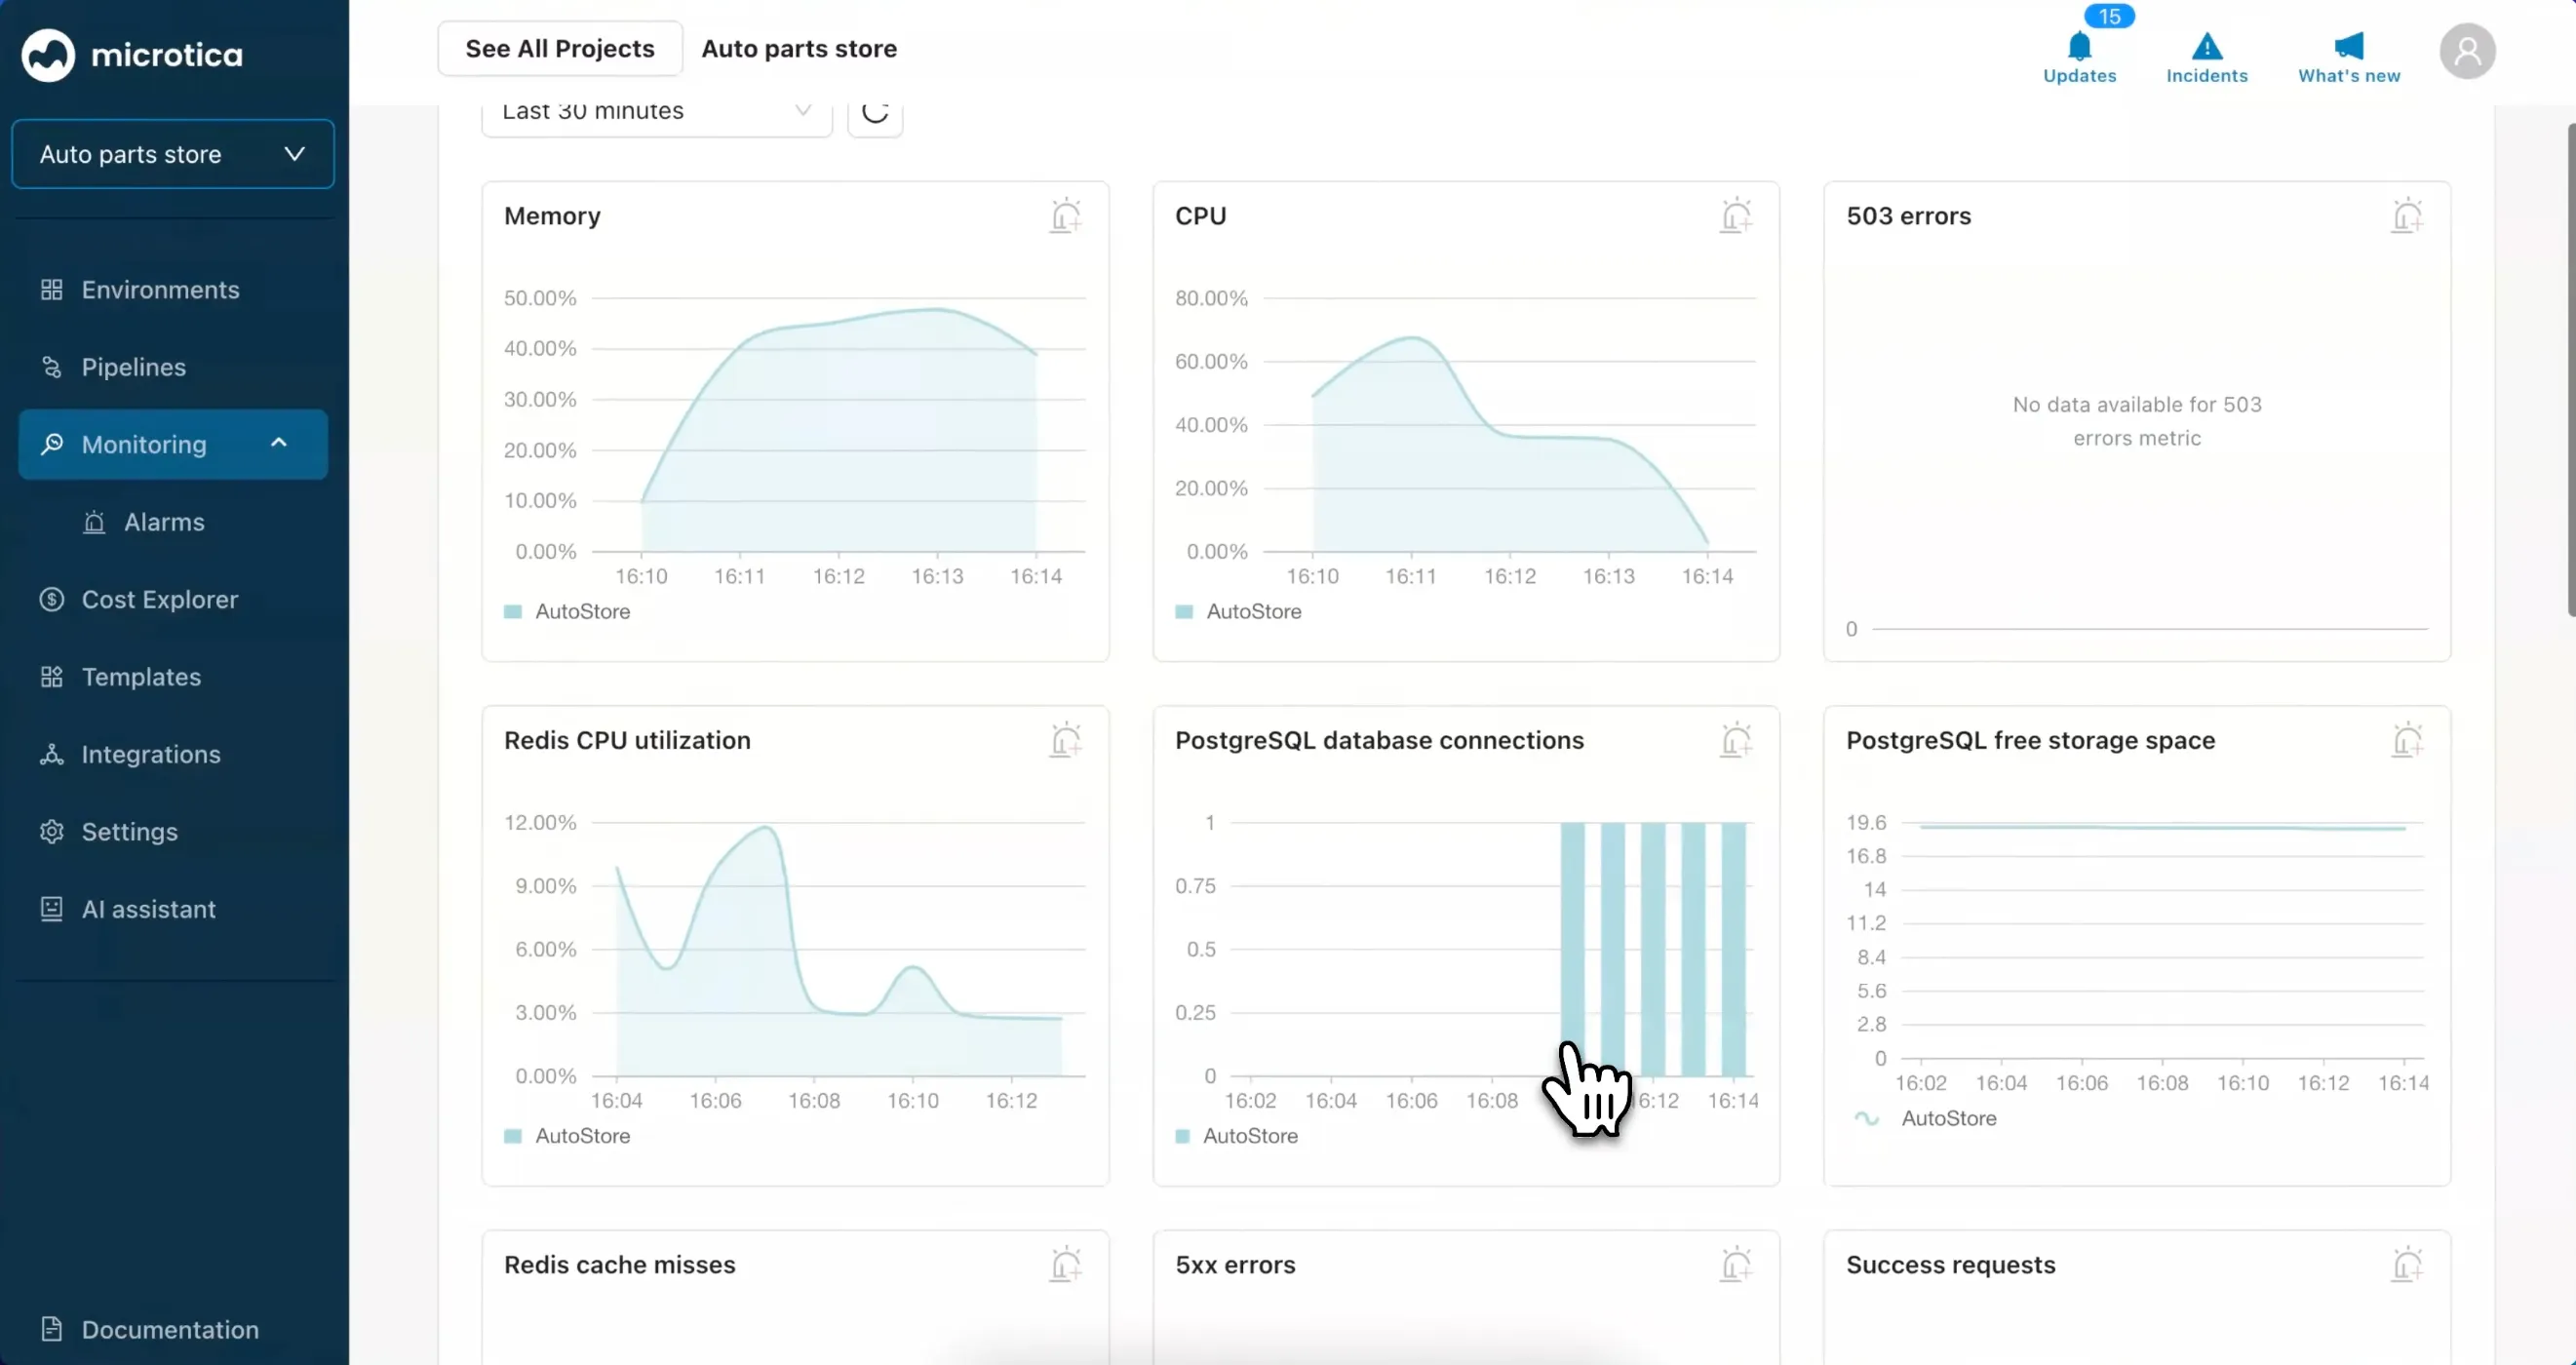
After enabling monitoring, you should see your metrics in the Monitoring tab. The metrics include CPU usage, memory, cached items, errors, etc.
Another way to monitor your application is to check its logs. To do this, go to the Application’s environment and click the Logs tab. You'll then see the current logs of your application.
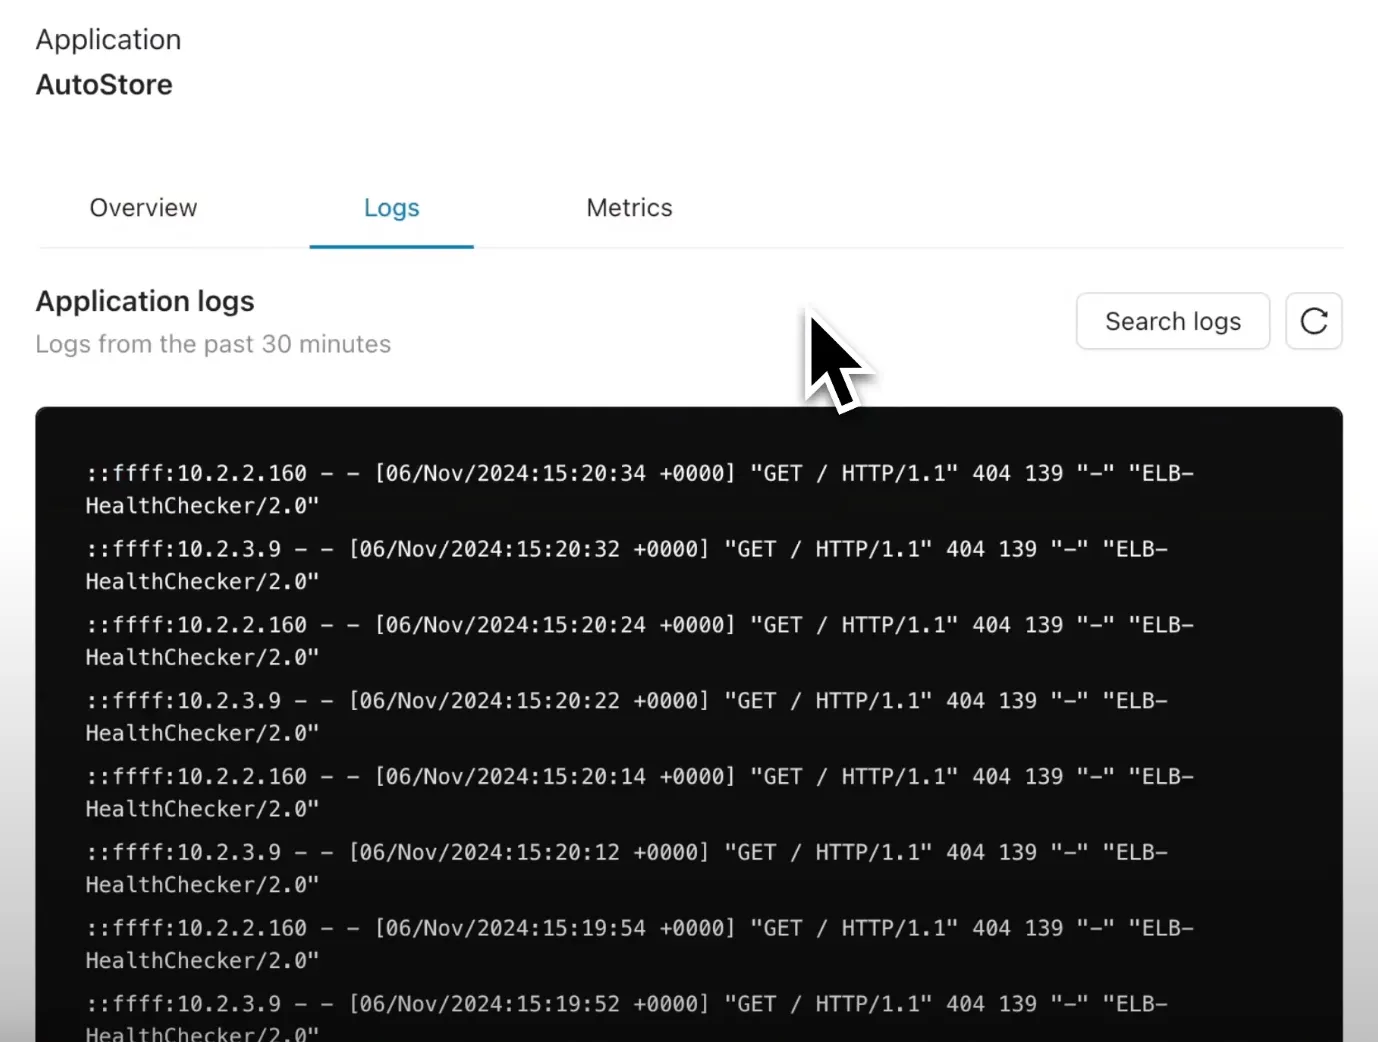
One underrated feature of Microtica is that you can easily check previous logs of selected dates. To learn more about Monitoring and alerting with Microtica, watch this video 👇:
https://www.youtube.com/watch?v=SQKdn2tiD8c
Scaling Applications
Scaling applications in Microtica is very easy. You just need to make some configuration changes; it's that simple. In Microtica, you can scale your application either vertically or horizontally, all within the Microtica environment. In the application's settings, under Scaling, you will find all the resource options you can adjust, such as CPU, memory, and instance replication.
To learn how to scale applications in Microtica, read this guide. It will walk you through the easy steps on how to scale apps in Microtica.
Cost Optimization 💸
Microtica offers a feature within the platform for managing and reducing your AWS cloud costs. Apart from that, it helps analyze your expenses on your cloud infrastructure (AWS) and acts as an advisor for your expenses. It seamlessly integrates with your AWS account, requiring just a CloudFormation stack setup, which grants Microtica the necessary permissions.
The Cost Explorer feature in the platform is used for monitoring expenses, and this also helps with cost optimization. To see how Microtica optimizes cloud costs, read this article.
Advanced Features of Microtica
We’ve previously looked into the basic features of Microtica. However, there are a lot of things you can still do with Microtica. While Microtica is a powerful platform that doesn’t let you worry about getting things done manually, there are other things that the platform offers.
In this section, we will look into some other capabilities of Microtica and why you need them in your workflows.
Custom Domain Setup
Earlier, we explored how you can get a free domain while deploying your Next.js application—it was also mentioned that Microtica lets you configure your custom domain by integrating with your preferred DNS provider.
Now, we’ll have a look at how to set up a custom domain in Microtica. 🚀
- Head to your Next.js application’s settings.
- Move to the Domain tab and select the Add your own custom domain. When done, input your domain.
- Update your DNS records for the domain by adding the given CNAME records to your provider.
- Click the Next button, and wait for the application to propagate for some time.
- Click the Restart button and you have your application deployed to your custom domain! ☁️ 👨💻
That’s how easy it is to configure a custom domain with your Microtica application.
Continuous Integration/Continuous Deployment (CI/CD)
Instead of working with CI/CD pipelines manually, Microtica uses its embedded release engineer feature to automate CI/CD pipelines. By using Microtica for CI/CD automation and optimization, you don’t have to worry about your pipelines’ management, too, as Microtica helps you manage them. With the Release Engineer feature, Microtica also automates deployments with git push.
If you want to learn how Microtica uses the Release Engineer for CI/CD automation and management, refer to this guide.
Infrastructure as Code (Iac)
Microtica allows teams to manage and provision infrastructure through Infrastructure as Code (Iac) instead of manual processes. With Microtica, you can define and version-control infrastructure configurations with CloudFormation or Terraform for consistency.
Microtica works with AWS and GCP to allow you to manage infrastructure as code (IaC) with ease. When using CloudFormation, you work with JSON or YAML for defining templates. But when working with Terraform, you're expected to have some expertise in Hashicorp Configuration Language (HCL).
To learn more about the Iac feature in Microtica, refer to this guide.
Summary
Microtica is one of the best DevOps tools that provides a seamless way to deploy clusters and applications to the cloud. Apart from these, it minimizes workload and enhances productivity for developers and teams.
This article focused on how developers and teams can automatically deploy containers without any manual constraints. Additionally, we looked into how teams and engineers can scale their applications and monitor their logs, metrics, and costs, as well as the basic and advanced features of Microtica.

After exploring Microtica’s capabilities, I’m sure that you’ll love to try it out—by doing this, I’m sure your future self will thank you. 😂
Thanks for taking the time to read this article. If you have any questions about Microtica and deploying containers with it, you can join our Discord Community or leave some comments below. I'm looking forward to hearing what you think about Microtica; see you in the cloud! 😛☁️

Relevant Posts