Deploying Medusa on AWS: Simplify Your Setup with Microtica

Medusa is an open-source, Node.js-based e-commerce platform designed as a flexible alternative to traditional solutions like Shopify. Its modular and customizable architecture allows businesses to build online stores tailored precisely to their unique needs, whether that involves product management, payment processing, or order fulfillment. Deploying Medusa on AWS combines this flexibility with the power of AWS’s scalable and serverless infrastructure, making it easier to manage, scale, and optimize your e-commerce environment. In this section, we’ll explore Medusa’s key components and the advantages of running it on AWS, setting the stage for a smooth deployment process.
What Is Medusa and Why Deploy It on AWS?
Medusa is an open-source Node.js e-commerce alternative to Shopify. Unlike many e-commerce solutions, it is highly customizable, which is why it’s such a popular choice.
With Medusa, businesses can tailor their storefronts and backend functionality to their needs. Thanks to its modular architecture, you can plug in only the features you need, such as product management, payment processing, or order fulfillment.
Medusa is made up of three components:
- A headless backend engine that holds all the logic and data of the store and exposes APIs to communicate with the admin and storefront.
- An admin dashboard that allows store operators to manage their orders and products
- A storefront, which is ultimately an e-commerce website where customers can preview products and make orders.
Deploying Medusa on AWS provides several benefits:
- Out-of-the-box serverless infrastructure with Fargate
- Infrastructure and data ownership on your AWS account
- Autoscaling based on application load
- Automated git-push deployments and rollbacks
- Production-ready solution
- Resource monitoring and performance insights in-app.
While deploying Medusa on AWS using Microtica’s template is designed to be cost-efficient, it's important to keep an eye on AWS resource usage and billing. Being aware of the AWS cost challenges will help you manage your expenses better.
Getting Started with Medusa Deployment on AWS
Before you begin your Medusa.js deployment, ensure you have the following:
- A Git account: Any provider such as GitHub, BitBucket, GitLab, and CodeCommit is supported.
- A Microtica Account: Sign up with your email or Git account.
- An AWS Account: You must sign up for AWS in order to deploy your Medusa server.
With these three accounts ready to go, you're all set to start your Medusa.js deployment and take your project to the next level.
Step-by-Step Guide to Deploy Medusa
Here’s how to deploy your Medusa server on AWS one step at a time:
Step 1: Deploy a new Medusa Server
After creating a Microtica account, click the Deploy app button to land on the Templates page, where you can see a list of all production-ready templates.

This template creates the following infrastructure resources that will be provisioned on your AWS account:
- VPC, subnets and networking,
- Container infrastructure based on Fargate,
- application load balancer,
- persistent storage,
- S3 bucket,
- Postgres database,
- and Redis (in production mode)
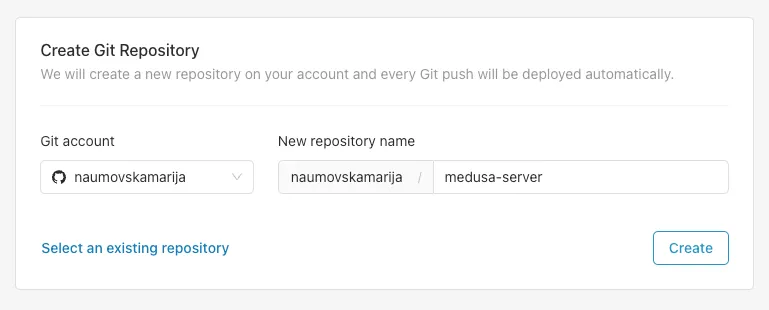
Step 2: Create a Git repository
Connect your preferred Git account. Microtica will create a repository on your Git account with a default repo name `medusa-server`.
Step 3: Configure Template
Here you can customize the template for your needs by providing environment variables. Enter an application name and the admin credentials that will be used to create an initial admin user with which you can later sign in to your Medusa Admin.
Select whether you want a production Medusa Server environment or a development one. In production mode, this template will provision managed RDS PostgreSQL and Redis instances. In development mode, the template will use local SQLite and a fake Redis instance.
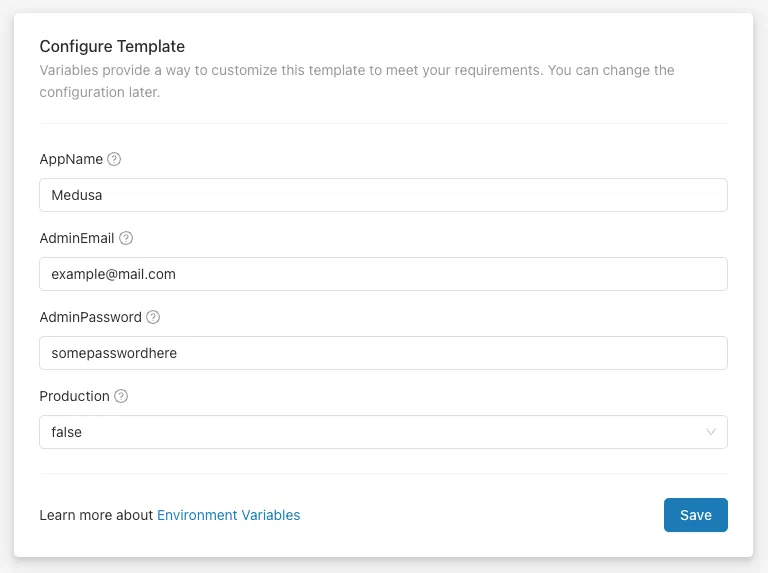
Environment variables can be updated/added/configured after deployment as well.
Step 4: Connect an AWS account
Now, you can select the environment in which you want to deploy the template. A default environment called `development` will be preselected here, or you can create a new environment.
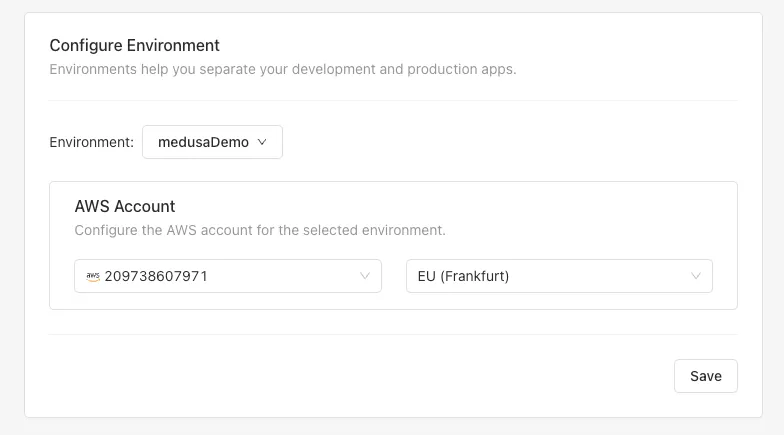
Connect your AWS account when prompted. This process takes only a few seconds, so afterwards only choose the region you want to deploy in.
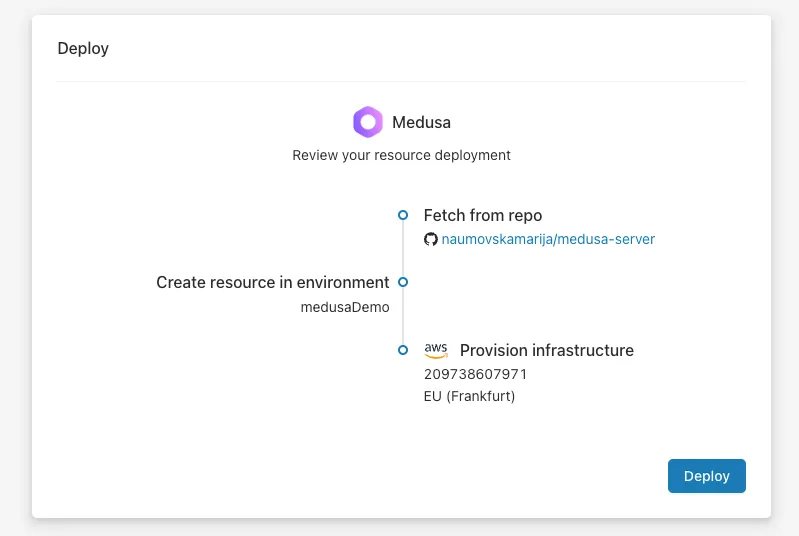
Step 5. Deploy the Medusa Server Template to AWS
Review the deployment summary, which details all the resources that will be provisioned on your AWS account. Click the Deploy button to start creating the infrastructure for a Medusa server.
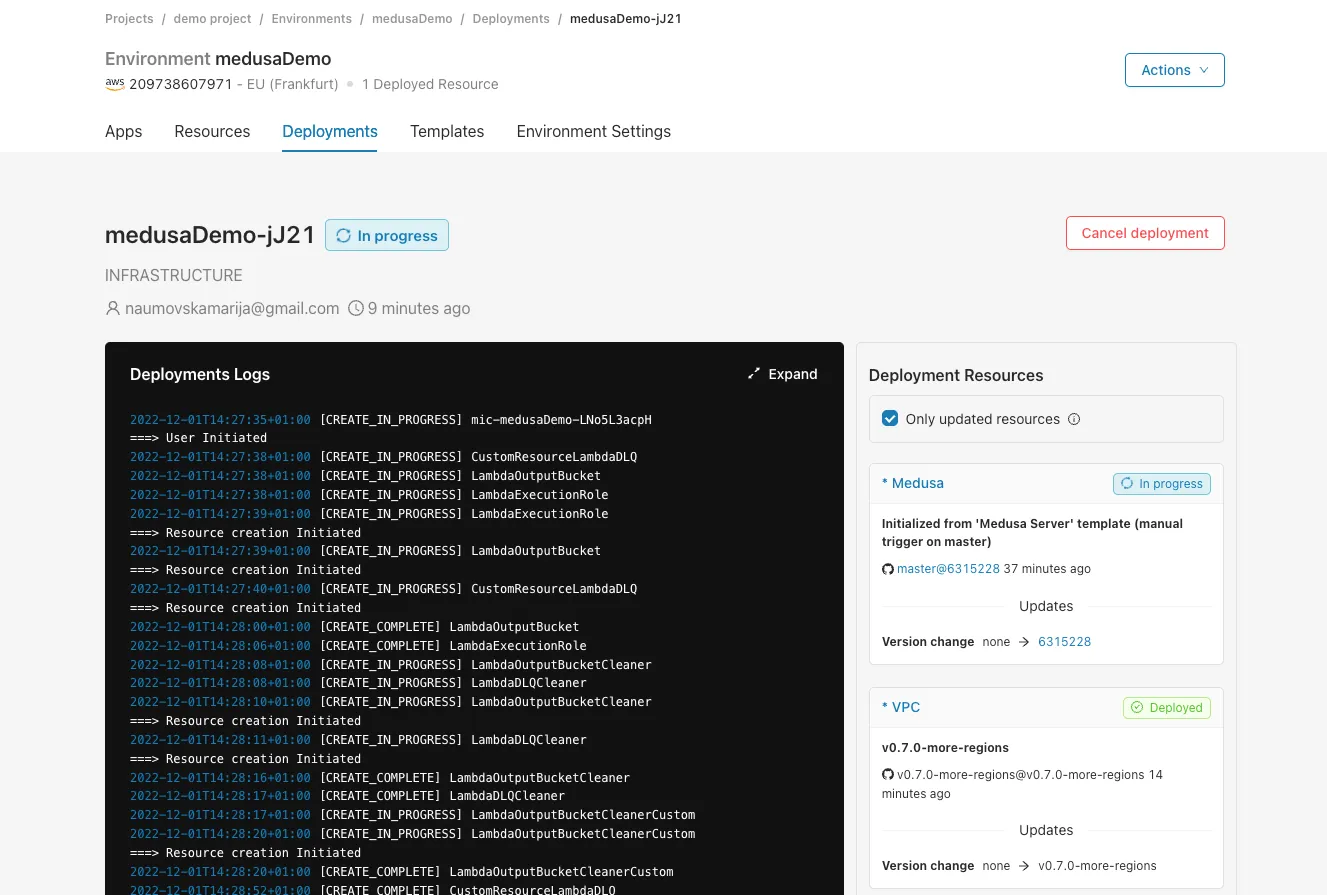
The Medusa deployment typically takes 10 minutes. You can follow the build pipeline in real time by clicking the View Logs button.
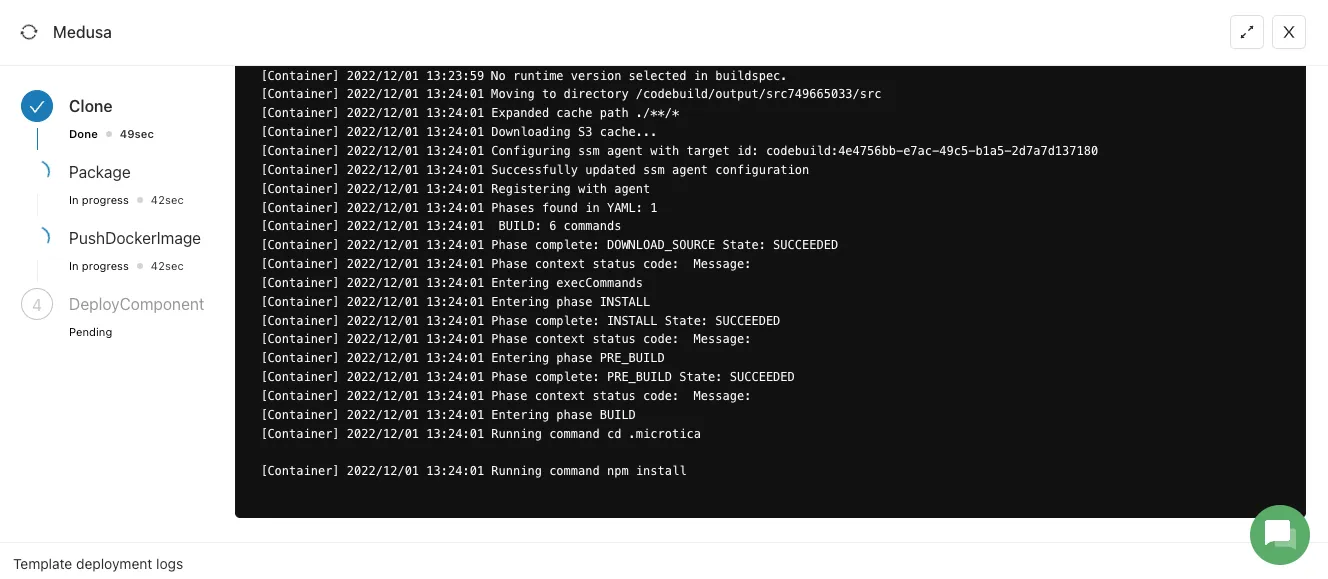
Once the build process is complete, a new deployment with the infrastructure resources is triggered. You can follow the logs of the deployment process by clicking the View deployment button and selecting the deployment from the list.
Step 6: Preview the Environment
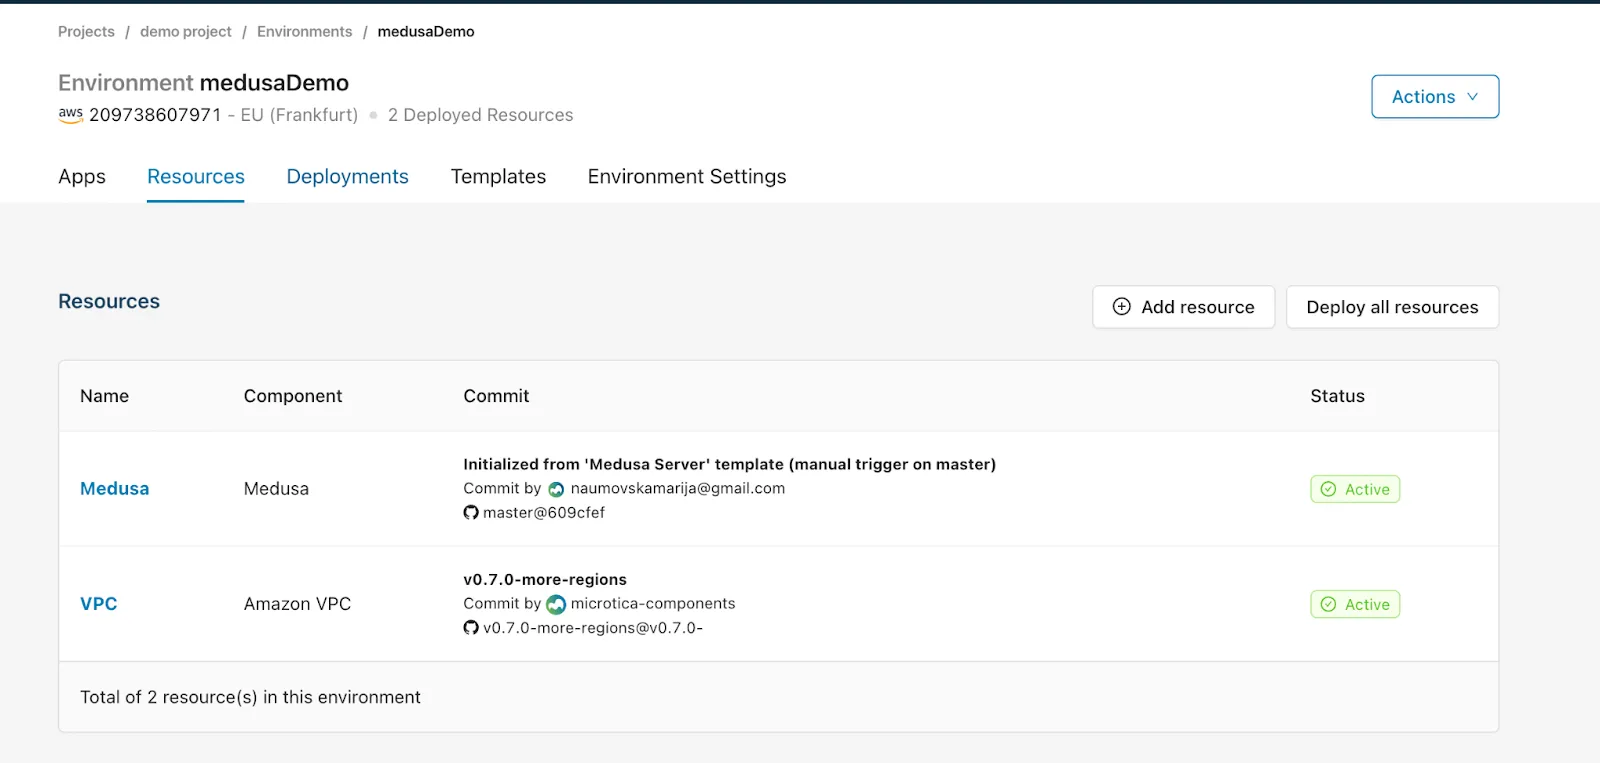
After the deployment is finished, navigate to Resources → [AppName] (Medusa in our case) → Overview, and under Resource Outputs you should see the AccessURL.
This is the server url that you can use to access API endpoints. Try getting the list of products using the endpoint `/store/products`.

The image below shows how your environment should look after deploying both templates.
Bonus: Cleanup
To remove all the resources created on your AWS account, navigate to your environment → Environment Settings → Infrastructure, and you’ll see the Undeploy section.
This will clean up the resources created in AWS, but you will still have the configuration in Microtica in case you want to deploy it in the cloud again.
Deploy an existing Medusa Server
If you already have a Medusa Server repository and wish to migrate it to AWS, you may need to adjust your source code. Check out the latest Medusa server documentation on how to configure and import your Medusa server repo code.
Common Deployment Issues and Troubleshooting for Medusa
If you’ve never deployed a Medusa server before, you may run into some issues like:
- Environment issues: Minor typos or missing values in your environment variables can cause problems with the server. That’s why it’s important to double-check your configuration, especially when switching between production and development modes.
- Resource limits: AWS services have some quotas and limits. If you notice any issues, it could mean you’re hitting one of these limits. A quick peek into your AWS console can help you figure out if that’s the case.
- Deployment pipeline glitches: The deployment logs can reveal build errors or timeouts. We suggest you take a look at the logs for hints on what might be failing, and try re-deploying if necessary.
If you run into any of these issues, you should revisit each step and see if you missed anything. Also, always follow deployment best practices to prevent these issues in the first place.
Conclusion
Deploying Medusa on AWS using Microtica’s template offers a straightforward and efficient way to launch your own customizable e-commerce platform. With clear steps, strong infrastructure, and the flexibility of AWS, you can have a scalable and production-ready solution. While there may be some challenges along the way, such as environment setup or resource limitations, these are easily manageable with careful configuration and troubleshooting. Once deployed, you'll have a powerful, tailored solution ready to meet your business's unique needs.

Relevant Posts